Apple pie and cheesecake join forces in this rich, comforting dessert that never fails to impress. Each bite delivers a luscious blend of creamy cheesecake, spiced apple filling, and a golden, buttery crumb topping. This recipe (apple crumb cheesecake recipe) brings the warmth of a classic apple crisp and the indulgence of a New York-style cheesecake to your table in one decadent slice. Perfect for autumn gatherings or holiday desserts, this cheesecake captures the essence of homemade coziness without demanding expert-level baking skills. Tart apples provide the right contrast to the smooth, slightly tangy cream cheese layer, while cinnamon and brown sugar wrap everything in nostalgic flavor. A graham cracker crust anchors the layers with just the right crunch. Serve it cold for a refreshing finish or slightly warm for an ultra-comforting bite. Dessert doesn’t get more soul-satisfying than this apple crumb cheesecake—just one slice may spark your next seasonal tradition.
Ingredients
For the Graham Cracker Crust:
- 1 ½ cups graham cracker crumbs
- 2 tablespoons granulated sugar
- ½ teaspoon ground cinnamon
- 6 tablespoons unsalted butter, melted
For the Cheesecake Filling:
- 24 oz (3 packages) cream cheese, softened
- ¾ cup granulated sugar
- ½ cup sour cream
- 1 teaspoon vanilla extract
- 3 large eggs
- 2 tablespoons all-purpose flour
For the Spiced Apple Layer:
- 2 medium apples (Granny Smith or Honeycrisp), peeled and finely chopped
- 2 tablespoons brown sugar
- ½ teaspoon ground cinnamon
- ⅛ teaspoon ground nutmeg
- 1 teaspoon lemon juice
For the Crumb Topping:
- ¾ cup all-purpose flour
- ½ cup brown sugar
- ½ teaspoon ground cinnamon
- 6 tablespoons unsalted butter, cold and cubed
Essential Equipment:
- 9-inch springform pan – Ideal for easy removal and clean edges
- Mixing bowls (medium and large) – For crust, filling, apples, and crumb topping
- Electric hand mixer or stand mixer – For a smooth, creamy cheesecake batter
- Rubber spatula – Helps scrape every bit of batter and fold ingredients evenly
- Measuring cups and spoons – Accurate measurements make all the difference
- Knife and cutting board – To peel and finely chop the apples
- Baking sheet – To place under the springform pan and catch any drips
- Parchment paper or foil – Optional, but useful to wrap the pan for water baths
- Cooling rack – For resting the cheesecake after baking
Step By Step Guide Of Apple Crumb Cheesecake Recipe

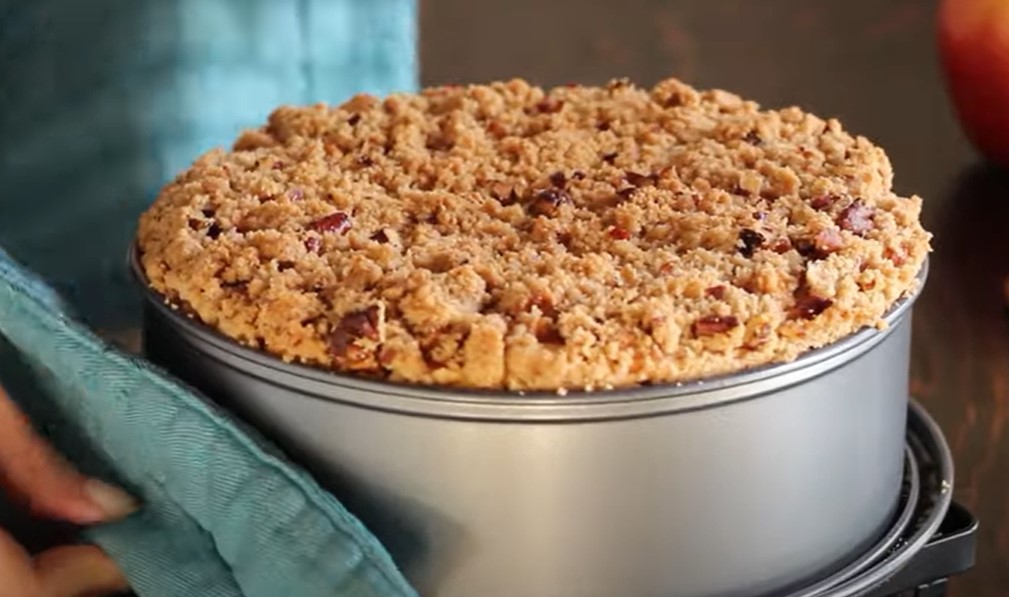
Step 1: Prepare the Springform Pan
Grease a 9-inch springform pan with butter or non-stick spray. Line the bottom with parchment paper if you want extra security when releasing the cheesecake. Wrap the outside of the pan in foil to prevent leaks during baking.
Step 2: Make the Graham Cracker Crust
In a medium bowl, combine graham cracker crumbs, sugar, cinnamon, and melted butter. Stir until the texture resembles wet sand. Press the mixture evenly into the bottom of the pan using the bottom of a glass or measuring cup.
Step 3: Bake the Crust
Place the crust in a preheated 325°F (163°C) oven and bake for 8–10 minutes until golden. Remove from the oven and let it cool while you prepare the filling and toppings.
Step 4: Mix the Cheesecake Filling
In a large bowl, beat the softened cream cheese until smooth and creamy. Add sugar and mix until fully combined. Add sour cream, vanilla, and flour, mixing well. Beat in the eggs one at a time until the batter is silky and lump-free.
Step 5: Cook the Spiced Apple Topping
In a skillet over medium heat, add chopped apples, brown sugar, cinnamon, nutmeg, and lemon juice. Cook for 5–7 minutes until apples soften slightly and the mixture thickens. Remove from heat and let it cool.
Step 6: Make the Crumb Topping
In a separate bowl, mix flour, brown sugar, and cinnamon. Cut in the cold butter using a pastry cutter or your fingers until the mixture forms coarse crumbs. Chill the crumb topping in the fridge while assembling the cheesecake.
Step 7: Assemble the Cheesecake Layers
Pour the cheesecake filling over the cooled crust and smooth the top with a spatula. Spoon the cooked apples evenly over the batter. Gently press them in so they settle slightly.
Step 8: Add the Crumb Topping
Sprinkle the crumb topping generously over the apples. Make sure the crumbs are spread evenly across the entire surface without pressing them down.
Step 9: Bake the Cheesecake
Place the pan on a baking sheet and bake at 325°F (163°C) for 55–70 minutes. The center should still have a slight jiggle while the edges are set. If the top starts to brown too quickly, loosely tent with foil.
Step 10: Cool the Cheesecake Slowly
Turn off the oven, crack the door, and let the cheesecake sit inside for 1 hour. Then transfer it to a cooling rack. Let it cool completely at room temperature before refrigerating.
Step 11: Chill Before Serving
Refrigerate the cheesecake for at least 6 hours or overnight. This helps it set fully and enhances the flavor and texture. Slice with a sharp, clean knife for neat servings.
Serving Tips
Serve Chilled or Slightly Warm
For a classic experience, serve the cheesecake chilled straight from the fridge. For a cozy twist, warm individual slices in the microwave for about 10–15 seconds—just enough to soften the crumb and warm the apples slightly.
Top with Caramel Sauce
Drizzle warm salted caramel sauce over each slice for a decadent touch. The rich, buttery caramel enhances the apple flavor and adds beautiful presentation value.
Add a Dollop of Whipped Cream
A swirl of freshly whipped cream balances the richness of the cheesecake and adds lightness to each bite. For extra flair, dust the cream with a little ground cinnamon or nutmeg.
Pair with Coffee or Cider
Serve alongside a hot cup of coffee, espresso, or a glass of warm apple cider. These drinks complement the fall flavors and elevate your dessert to café-style comfort.
Perfection Tips
Bring Ingredients to Room Temperature
Use room-temperature cream cheese, eggs, and sour cream to avoid lumps in your batter. This creates a smooth, creamy texture and helps everything mix evenly.
Avoid Overmixing the Batter
Mix the cheesecake filling just until everything is combined. Overmixing adds excess air, which can cause the cheesecake to puff up and crack while baking.
Use a Water Bath or Steam Method
To prevent cracks and ensure even baking, place a pan of hot water on the oven rack below the cheesecake. The steam helps maintain a moist environment inside the oven.
Cool Slowly
Rapid cooling can cause cracks. Let the cheesecake rest in the turned-off oven with the door slightly open for an hour before moving it to room temperature.
Chill Overnight for Best Results
Give the cheesecake at least 6 hours—or better yet, overnight—in the refrigerator. This helps it set fully and enhances both texture and flavor.
FAQs
1. Can I make this cheesecake ahead of time?
Yes, this cheesecake is perfect for making ahead. Prepare it the day before and chill overnight to allow it to set completely and develop full flavor.
2. What type of apples work best for this recipe?
Granny Smith and Honeycrisp are excellent choices. They hold their shape well during baking and balance the sweetness with a slight tartness.
3. How do I prevent the cheesecake from cracking?
Use room-temperature ingredients, avoid overmixing, and cool the cheesecake slowly. A water bath or steam pan also helps maintain a smooth, crack-free surface.
4. Can I freeze this cheesecake?
Yes, once fully cooled and set, wrap slices tightly in plastic wrap and freeze for up to 2 months. Thaw in the refrigerator overnight before serving.
5. How long does it last in the fridge?
Stored in an airtight container, the cheesecake will stay fresh for 4–5 days in the refrigerator.
Conclusion
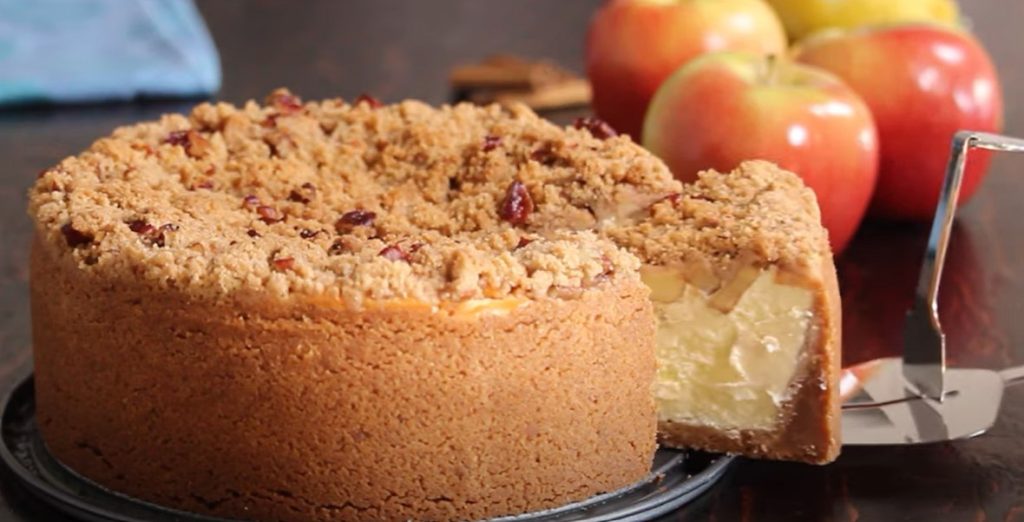
Apple Crumb Cheesecake brings together the best of two dessert worlds—creamy, rich cheesecake and warm, cinnamon-kissed apple crumble. With its buttery crust, soft spiced apples, and golden crumb topping, this dessert delivers unforgettable flavor in every bite. Whether you’re baking for a holiday table or just craving a cozy treat, this recipe offers homemade comfort with bakery-quality results. Try it once, and it just might become your new favorite.
Related Recipes