
How to draw a strawberry cheesecake? To draw a strawberry cheesecake, sketch a round cake slice with a thick crust at the bottom. Add smooth, creamy layers above the crust. On top, draw whole or sliced strawberries and glossy strawberry sauce dripping slightly over the edges. Use shading to show depth and texture.
If you’ve ever wished to translate the delicious beauty of a strawberry cheesecake onto paper, you’re in the right place. This guide is tailored just for you. Whether you’re an aspiring artist or simply looking to express your creativity, learning how to draw a strawberry cheesecake is both fun and satisfying.
You’ll not only sharpen your drawing skills but also discover an exciting new way to indulge in your love for desserts. Ready to bring this delicious masterpiece to life? Let’s dive in and turn your canvas into a slice of sweet art!
Credit: omgchocolatedesserts.com
How to Draw a Strawberry Cheesecake?
Materials Needed
Gather pencils, erasers, and paper to start sketching. Colored pencils or markers will add vibrant hues to your cheesecake drawing. A ruler helps with precise shapes and lines.
Creating a delightful drawing of a strawberry cheesecake can be just as satisfying as indulging in a real slice. To bring this delicious dessert to life on paper, you’ll need the right tools. Gathering the proper materials is a crucial first step on your artistic journey.
Are you ready to assemble your artistic toolkit?
1. Drawing Paper
Start with a quality piece of drawing paper. It should be sturdy enough to handle erasing without tearing. Sketch pads or individual sheets of smooth Bristol board are excellent choices. They offer a good surface for both pencil and colored pencil work.
2. Pencils
A variety of pencils is essential. Use a 2H pencil for light sketches, which helps you outline without leaving dark marks. For shading and details, switch to a 2B or 4B pencil. These provide richer, darker lines that bring your cheesecake to life.
3. Erasers
Mistakes happen, and that’s okay. Have a kneaded eraser on hand. It’s perfect for lightening areas without completely removing them. A vinyl eraser is also useful for erasing small, precise areas, like the seeds on a strawberry.
4. Colored Pencils
To capture the vibrant red of strawberries and the creamy yellow of cheesecake, colored pencils are indispensable. Brands like Prismacolor offer a wide range of hues. Layer different shades to create depth and realism in your drawing.
5. Blending Tools
Enhance your drawing with smooth transitions using blending tools. Tortillons or blending stumps are great for this. They help soften pencil marks and blend colors seamlessly, creating a more polished look.
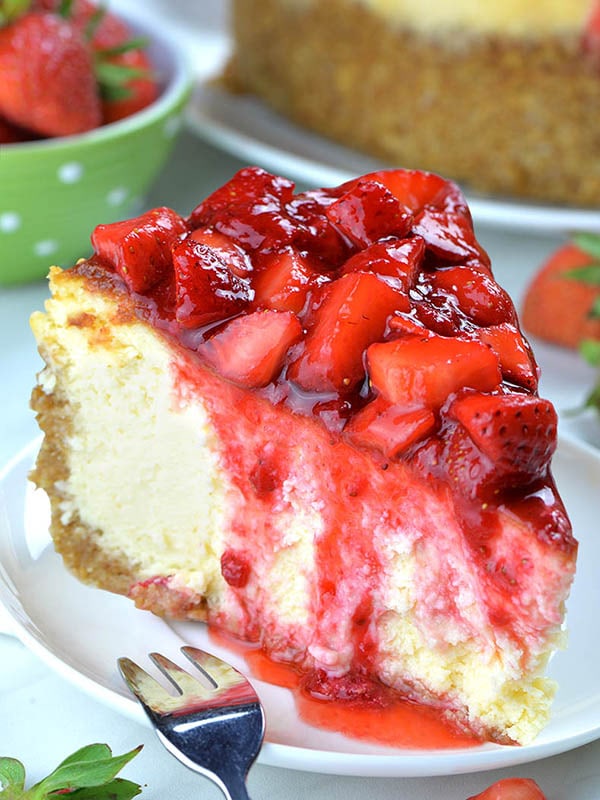
6. Reference Image
Having a reference image is incredibly helpful. Choose a picture of a strawberry cheesecake that inspires you. Study the details—the texture of the cake, the shine on the strawberries—to guide your drawing.
7. Ruler
A ruler might not be the first tool you think of, but it’s useful for drawing straight lines, like the plate’s edge. It ensures that your proportions are balanced and accurate.
8. Sharpener
Keep your pencils sharp with a reliable sharpener. A sharp point allows for more precise details and cleaner lines. Whether you’re defining the crust or the strawberry seeds, sharp pencils make a difference.
9. Fixative Spray
Once you’re satisfied with your masterpiece, preserve it with a fixative spray. It prevents smudging and keeps the colors vibrant. Spray lightly in a well-ventilated area for best results.
Embarking on this creative endeavor is exciting. With these materials, you’re well-prepared to create a strawberry cheesecake drawing that looks good enough to eat.
What personal touches will you add to your drawing to make it uniquely yours?
Sketching The Basic Shape
Drawing a strawberry cheesecake can be a delightful artistic experience. Start with the basic shape to ensure your drawing captures the essence of this delicious dessert. This initial step sets the foundation for adding details like strawberries and the creamy texture.
Understanding The Structure
Begin by visualizing the cheesecake as a whole. Picture its round shape and thick layers. The base is usually circular and slightly raised.
Creating The Outline
Draw a large circle to represent the cheesecake. Use light pencil strokes to keep it easy to modify. This circle will be the top view of your cheesecake.
Defining The Height
Add a vertical line from the center of the circle. Extend it downward to define the cake’s height. This line helps you gauge the proportions.
Shaping The Edges
Sketch the sides using curved lines. Connect them with the circle’s edge. These lines create the cheesecake’s sides, giving it a 3D look.
Adding The Base
Complete the base by drawing a smaller circle beneath the main one. This represents the crust. It’s essential for an authentic cheesecake look.
Visualizing The Layers
Divide the height into sections. Use horizontal lines to separate layers. This step highlights the creamy texture and fruity topping.
Adding Details And Texture
Capture the charm of a strawberry cheesecake by focusing on details and texture. Highlight the smooth, creamy surface of the cake. Add the luscious red strawberries and detailed crumbs of the crust. These elements bring your drawing to life.
Creating a drawing of a strawberry cheesecake that looks almost good enough to eat requires attention to detail and texture. Adding these elements can bring your artwork to life, making it more realistic and visually appealing. You don’t need to be a professional artist to achieve this; it’s all about patience and keen observation. Imagine the joy of capturing the essence of a delicious dessert through your pencil or brush strokes. Let’s delve into the techniques that will help you add depth and richness to your strawberry cheesecake drawing.
Understanding The Layers
When you think of a strawberry cheesecake, what layers come to mind? Consider the crumbly base, the creamy cheesecake layer, and the vibrant strawberry topping. Each layer has its own distinct texture. You can start by sketching the basic outline of these layers, paying attention to how they stack up. This foundation sets the stage for adding intricate details later on.
Capturing The Crust
The crust is often overlooked, but it adds a vital texture to your drawing. Notice how a cheesecake’s crust appears crumbly and uneven. Use light, short strokes to mimic this texture. Pencil or even charcoal can help create that rough, crumb-like appearance. Have you noticed how tiny cracks and bumps can make the crust more realistic? Try adding them to your drawing.
Creating Creamy Smoothness
The cheesecake filling should look smooth and inviting. Use blending techniques to achieve this creamy texture. Consider using a soft brush or blending stump to smooth out pencil marks. How can you make the filling look soft yet solid? Experiment with shading to create a subtle transition between light and shadow. This will add depth to your artwork.
Depicting Juicy Strawberries
Strawberries are the stars of the show. They’re vibrant and juicy, and capturing their details can be fun. Notice the tiny seeds and the glossy surface. Use tiny dots for seeds and smooth lines for the shine on the strawberries. Can you picture how reflections and highlights can make them look fresh? Try adding these elements for an authentic look.
Enhancing With Shadows And Highlights
Adding shadows and highlights can transform your drawing from flat to three-dimensional. Shadows give depth, while highlights create contrast. Observe where light naturally falls on a cheesecake and strawberries. How do shadows alter the appearance? Use darker shades in shadow areas and lighter tones for highlights. These simple touches can make a big difference.
Using Color For Realism
If you’re working with color, choose shades that mirror real-life cheesecake and strawberries. A light tan for the crust, creamy white for the filling, and bright red for the strawberries can bring your drawing to life. How closely can you match the colors of a real cheesecake? Play with layers of color to achieve the perfect look.
Adding details and texture not only makes your strawberry cheesecake drawing more realistic but also more satisfying to create. Each stroke and shade contributes to the overall effect, leaving you with a piece of art that captures the mouthwatering essence of this delicious dessert. What techniques will you experiment with next to enhance your drawings?

Credit: www.youtube.com
Final Touches And Coloring
Adding final touches and coloring brings your strawberry cheesecake drawing to life. This step transforms it from a sketch into a vibrant masterpiece. Use colors to highlight the juicy strawberries and creamy cheesecake layers. With a few careful strokes, your drawing will look deliciously real.
Choosing The Right Colors
Pick colors that match a real strawberry cheesecake. Use a soft cream color for the cheesecake base. Choose bright red for the strawberries. Add a light green for the leaves.
Applying Base Colors
Start with the cheesecake base. Use soft strokes to apply a light cream color. Keep the color even. It forms a solid foundation for your drawing.
Coloring The Strawberries
Color the strawberries using a bright red shade. Focus on the strawberry seeds. Use a darker red for shadows. This adds depth and realism.
Adding Highlights And Shadows
Use a white pencil for highlights on the strawberries. This makes them look shiny and fresh. Add shadows with a darker red or brown. Shadows create a three-dimensional effect.
Detailing The Crust
Color the crust with a light brown. Use short strokes for a crumbly texture. Add darker brown for shadowing. This gives the crust a realistic look.
Enhancing With Final Details
Check for areas that need more detail. Add small touches where needed. Make sure the drawing looks balanced. Each element should stand out.
With these final touches, your strawberry cheesecake drawing is complete. It should look inviting and delicious, ready to impress anyone.

Credit: easyinstantrecipes.com
Frequently Asked Questions
How Do I Start Drawing A Cheesecake?
Start with a simple circle or oval shape for the cheesecake base. Add details gradually.
What Colors Should I Use For A Strawberry Cheesecake Drawing?
Use light pinks and reds for strawberries, creamy yellows for the cheesecake. Add white for highlights.
How Can I Make My Drawing Look Realistic?
Focus on shading and texture. Use darker shades for shadows. Light strokes for highlights.
Conclusion
Drawing a strawberry cheesecake can be a fun experience. Follow simple steps to create your masterpiece. Start with basic shapes, then add details. Use vibrant colors to bring your drawing to life. Practice makes perfect, so keep trying. Share your artwork with friends and family.
They will surely admire your creative skills. Remember, art is about expressing yourself. Enjoy the process and let your imagination soar. Soon, you’ll have a delightful drawing to showcase. Keep experimenting and improving your techniques. Happy drawing!
Related Recipes