How to sharpen a knife with a stone? To sharpen a knife with a stone, wet the stone with water or oil, hold the knife at a 15–20° angle, and slide the blade across the stone in a sweeping motion. Repeat evenly on both sides until sharp. Finish with a finer grit for a polished edge.
A sharp knife is not only safer, but it also makes cooking more enjoyable and efficient. Imagine gliding through your ingredients with ease, creating perfectly sliced vegetables and meats. Sharpening your knife with a stone might seem daunting, but it’s simpler than you think.
In this guide, you’ll discover how to transform your dull blades into precise tools that elevate your culinary skills. Keep reading to uncover the secrets of mastering this essential kitchen technique. Your future self will thank you every time you prepare a meal.
How to Sharpen a Knife With a Stone?
Choosing The Right Sharpening Stone
Choosing the right sharpening stone is crucial for effective knife sharpening. The stone plays a key role in achieving a sharp edge. Different stones offer varied results based on their material and grit.
Understanding Stone Types
Sharpening stones come in several types. The most common are natural stones, water stones, and oil stones. Natural stones, often sourced from quarries, offer a traditional sharpening experience. They provide a consistent feel but may wear out faster.
Water stones are synthetic and need to be soaked before use. They are popular due to their fast cutting capabilities. Oil stones require oil for lubrication, offering a smoother sharpening surface.
Considering Grit Levels
Grit levels determine the stone’s abrasiveness. Low grit stones (1000 or less) are for dull knives. They remove more metal, reshaping the edge. Medium grit stones (1000 to 3000) refine the edge, improving sharpness.
High grit stones (4000 and above) polish the blade, giving it a fine finish. Choose grit levels based on your knife’s condition. A sharper knife needs less abrasive grit.
Size And Shape Of Stones
Stone size affects ease of use. Large stones offer more surface area, ensuring even sharpening. Small stones are portable but require more precision. Stone shape can also impact comfort during sharpening.
Flat stones are common, providing stability. Rounded stones can offer unique sharpening angles. Select a size and shape that suits your sharpening style.
Durability And Maintenance
Durability is essential for long-term use. Quality stones last longer and resist wear. Maintenance involves cleaning and proper storage. Clean stones after use to remove metal particles.
Store them in a dry place to prevent damage. Proper care extends the life of your sharpening stone.

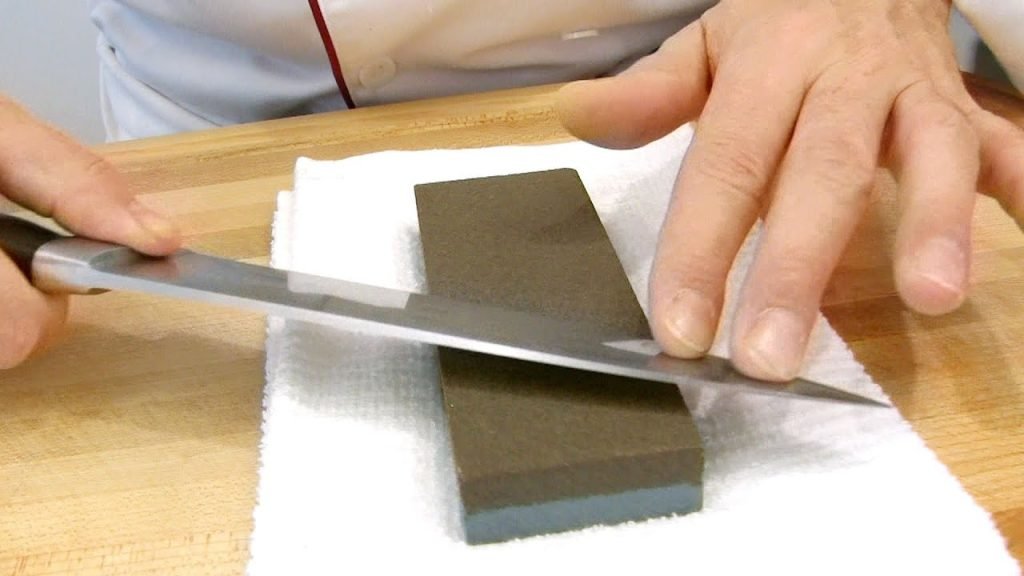
Credit: dreamofjapan.com
Preparing Your Knife And Stone
Sharpening a knife is an essential skill, and using a stone is a time-tested method for achieving a razor-sharp edge. Before diving into the sharpening process, it’s crucial to prepare both your knife and stone properly. This step ensures efficiency and precision, setting the stage for optimal results.
Choosing The Right Stone
Not all stones are created equal. For beginners, a medium-grit stone is a good starting point. It balances between fast sharpening and finishing the edge. If your knife is extremely dull, consider a coarse stone first. For the final touch, a fine-grit stone will refine the edge further.
Cleaning The Stone
Before sharpening, ensure your stone is clean. Dirt and metal shavings can clog the pores of the stone, reducing its effectiveness. Wash it with water and a gentle brush. Some stones require oil or water during sharpening, so read the manufacturer’s instructions.
Inspecting Your Knife
Examine your knife’s edge closely. Look for nicks, chips, or other damage. If the blade is severely damaged, sharpening might take longer. Understanding the current state of your knife helps you determine how much work is needed. Is your knife ready for a transformation?
Holding The Knife Correctly
Grip is crucial. Hold the knife securely, yet comfortably. Your fingers should guide the blade without straining. A stable hand ensures consistent pressure and angle throughout the sharpening process. How confidently do you handle your tools?
Setting Up Your Workspace
Find a stable surface. A wobbly table can lead to uneven sharpening. Lay down a towel or non-slip mat to keep the stone in place. Organize your space for easy access to water or oil, depending on your stone’s requirements. Is your workspace ready for action?
With your knife and stone properly prepared, you’re ready to embark on the sharpening journey. Remember, the foundation you set now will greatly impact the quality of your results.
Mastering The Sharpening Technique
Sharpening a knife with a stone is a skill worth learning. It requires patience, precision, and practice. A sharp knife makes cooking easier and safer. Understanding the technique helps achieve the best results. Let’s explore the steps in mastering this craft.
Understanding The Basics
Begin by choosing the right stone for your knife. Different stones have different grits. A coarse grit helps reshape the blade. A fine grit polishes the edge for sharpness. Knowing the stone type is crucial for effective sharpening.
Setting The Angle
The angle between the blade and stone is important. A common angle is 20 degrees. Hold the knife at this angle consistently. This ensures a sharp edge. An uneven angle can damage the blade.
Using Consistent Pressure
Apply even pressure while moving the blade. Too much pressure can wear the knife. Too little might not sharpen it. Consistency is key in achieving a sharp edge. Practice helps in maintaining this balance.
Stroking The Blade
Move the blade across the stone in smooth strokes. Start from the base to the tip. Repeat this motion several times. This technique is essential for sharpening. It helps in creating a uniform edge.
Checking The Sharpness
Test the knife’s sharpness carefully. Use a piece of paper or a tomato. A sharp knife should cut smoothly. If not, repeat the process. Checking ensures the knife is ready for use.
Checking Knife Sharpness
Sharpening a knife with a stone is a simple task. First, wet the stone slightly. Then, hold the knife at a 20-degree angle. Slide it across the stone in a smooth motion. Repeat for the other side. Check sharpness by slicing paper.
Sharpening a knife with a stone can be a rewarding skill to master. However, knowing when your knife is sharp enough is crucial. Checking the sharpness ensures your knife is ready for any culinary task you throw at it. But how do you know when it’s just right? Let’s dive into the process of testing your knife’s sharpness effectively.
1. The Paper Test
One of the simplest ways to check your knife’s sharpness is by using a piece of paper. Hold a sheet of paper in one hand and gently slice through it with your knife. If the knife glides through effortlessly, it’s sharp. If it snags or tears the paper, it needs more work on the stone.
2. The Tomato Test
Tomatoes can be surprisingly challenging for dull knives. Try slicing a ripe tomato with your knife. A sharp blade will cut cleanly through the skin without squashing the tomato. Not only does this test your blade, but you also end up with perfectly sliced tomatoes for your salad.
3. The Fingernail Test
This method is a bit more tactile. Lightly rest the blade on your fingernail at a slight angle. A sharp knife will catch slightly on the nail’s surface, while a dull blade will slide off. Be cautious and gentle to avoid any accidents.
4. The Arm Hair Test
Running your knife gently over your arm hair is another quick way to check sharpness. A well-sharpened knife will shave off a few hairs without much effort. Remember to do this carefully and only if you’re comfortable.
5. Consistency Is Key
While these tests are handy, consistency in your sharpening process is vital. Ensure you maintain an even angle and pressure on both sides of the blade. This not only sharpens the knife effectively but also extends its lifespan. Do you have any personal techniques for checking knife sharpness? Or maybe you’ve had a surprising experience while testing a blade? Share your thoughts and stories in the comments. Let’s make sharpening a knife with a stone an art form we can all master.
Maintaining Your Sharpening Stone
Sharpening a knife with a stone requires careful technique. Soak the stone in water first. Then, hold the knife at a 20-degree angle. Slide it across the stone evenly. Repeat until sharp.
Maintaining your sharpening stone is crucial to ensuring that your knives remain razor-sharp. A well-cared-for stone can make all the difference in your sharpening routine. It keeps the process smooth and effective, saving you time and effort. Think about it: would you rather struggle with a dull stone or glide effortlessly with a well-maintained one? Let’s dive into some practical tips to keep your sharpening stone in top shape.
1. Clean The Stone After Every Use
After sharpening, your stone is likely covered in metal filings and residue. Rinse it under warm water, gently scrubbing with a brush. This prevents the buildup of debris that can affect its performance.
2. Flatten The Stone Regularly
Over time, sharpening stones can develop uneven surfaces. This happens because certain areas wear down more quickly. Use a flattening stone or a lapping plate to keep your sharpening stone level.
3. Store The Stone Properly
Proper storage is essential to extend the life of your sharpening stone. Keep it in a dry place to avoid moisture damage. Consider a dedicated case or a cloth wrap to protect it from dust and accidental drops.
4. Use The Right Lubricant
Some stones work best with water, while others require oil. Check the manufacturer’s instructions to use the appropriate lubricant. This ensures optimal sharpening performance and prevents unnecessary wear.
5. Monitor For Cracks And Chips
Regular inspection for any damage can save you from future hassles. If you notice any cracks or chips, address them immediately. A damaged stone can hinder your sharpening process and even damage your knives. Remember, maintaining your sharpening stone is not just about the stone itself. It’s about ensuring your knives are always ready for action. How do you take care of your sharpening tools? Share your experiences in the comments.
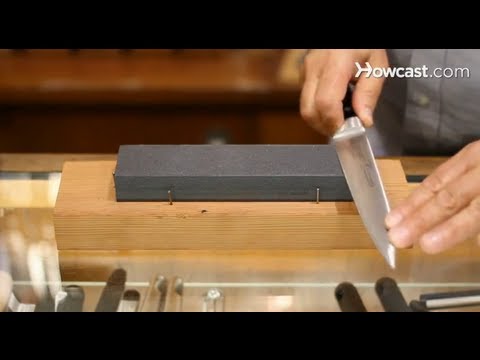
Credit: www.youtube.com
:max_bytes(150000):strip_icc()/how-to-sharpen-knife-with-whetstone-995817_FINAL-5c3facdec9e77c00019976bf.png)
Credit: www.thespruceeats.com
Frequently Asked Questions
What Type Of Stone Should I Use To Sharpen A Knife?
Use a whetstone or sharpening stone. These stones are ideal for maintaining sharpness.
How Often Should I Sharpen My Knife With A Stone?
Sharpen your knife when it feels dull. Typically, every few months for regular use.
Can I Use Any Water With The Sharpening Stone?
Yes, use clean water. It helps reduce friction and removes metal particles.
Conclusion
Sharpening a knife with a stone is simple and effective. Follow basic steps carefully for best results. Always ensure the stone and knife are clean. Practice makes perfect, so keep trying. Maintain a steady angle while sharpening. This ensures a sharp, long-lasting edge.
Be patient and gentle during the process. Safety is important; handle the knife carefully. A sharp knife makes cooking easier and safer. Now you know how to sharpen knives at home. Save money and time with this skill. Enjoy cooking with your newly sharpened knife!
Related Article