
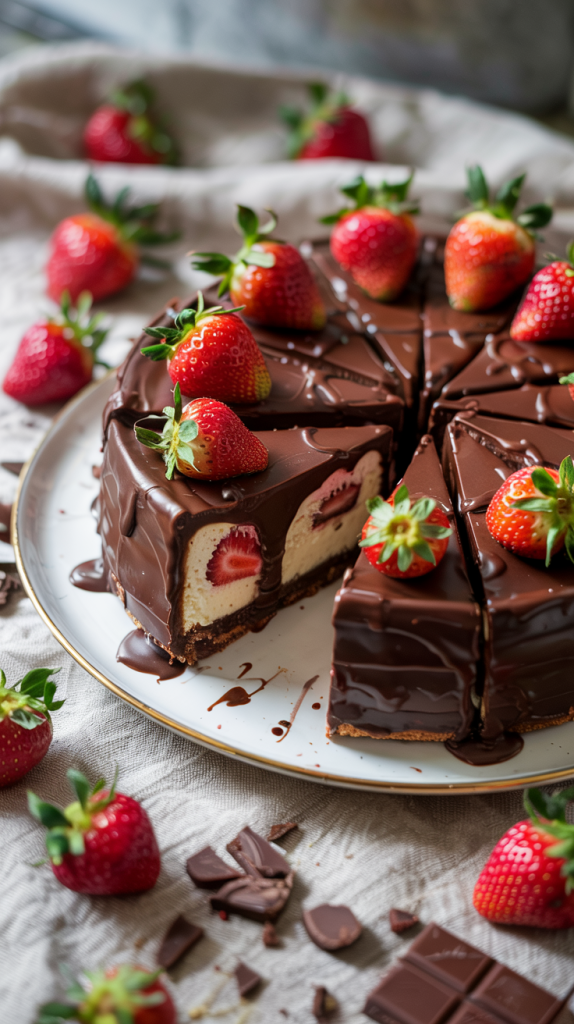
Fresh strawberries, creamy cheesecake, and rich chocolate don’t need to compete for attention in this dessert—they shine together. Each slice blends a buttery graham cracker crust, velvety cheesecake, and a glossy layer of chocolate-dipped strawberries right on top. The contrast between the cool creaminess and the crisp chocolate shell keeps every bite exciting. Guests don’t just enjoy this chocolate covered strawberry cheesecake; they talk about it long after the last forkful disappears. This recipe brings elegance to the table without adding stress in the kitchen. The steps stay simple, but the result looks bakery-worthy. A fresh berry topping with that decadent chocolate finish adds the kind of drama that makes an ordinary evening feel like a celebration. Whether it’s date night, a family dinner, or a weekend treat, this cheesecake grabs the spotlight with ease. Dessert dreams taste better with strawberries and chocolate leading the way.
Absolutely! Here’s a warm and inviting Ingredients section with a short intro followed by a clear bullet point list:
Ingredients Of Chocolate Covered Strawberry Cheesecake
This cheesecake layers rich textures and bold flavors, so gathering the right ingredients sets the stage for something unforgettable. Stick with fresh, high-quality items to let every bite shine—especially the strawberries and chocolate. Here’s everything you’ll need from crust to topping:
For the crust:
- 1 ½ cups graham cracker crumbs
- ¼ cup granulated sugar
- 6 tablespoons unsalted butter, melted
For the cheesecake filling:
- 24 oz cream cheese, softened
- 1 cup granulated sugar
- 1 teaspoon vanilla extract
- 3 large eggs
- ½ cup sour cream
- ¼ cup heavy cream
For the topping:
- 1 pint fresh strawberries, hulled
- 1 cup semi-sweet chocolate chips
- 1 tablespoon coconut oil or butter (for melting chocolate)
Use room-temperature ingredients for a smoother filling, and choose ripe, firm strawberries for the perfect chocolate coating.
Equipment Needed
Having the right tools makes the process smoother and helps the cheesecake set perfectly. This isn’t a complicated recipe, but a few key pieces of equipment will make a big difference. Before you start mixing, make sure these essentials are ready to go:
- 9-inch springform pan
- Mixing bowls (at least two)
- Electric mixer or stand mixer
- Rubber spatula
- Measuring cups and spoons
- Baking sheet (for the water bath)
- Aluminum foil (to wrap the springform pan)
- Cooling rack
- Small saucepan (for melting chocolate)
- Parchment paper or silicone mat (optional, for chocolate-dipped strawberries)
A springform pan is a must for that classic cheesecake shape, and wrapping it with foil keeps the water bath from seeping in. Keep everything close to avoid last-minute scrambles once the batter starts coming together.
Absolutely! Here’s a detailed Preparation Steps guide with clear instructions and a minimum of 10 step-by-step H3 subheadings to walk readers through the full cheesecake process:
Preparation Steps

Prep the Pan and Preheat the Oven
Wrap the outside of a 9-inch springform pan with heavy-duty foil to prevent leaks. Lightly grease the inside or line the bottom with parchment paper. Preheat your oven to 325°F (163°C) and place a rack in the center.
Make the Graham Cracker Crust
In a mixing bowl, combine graham cracker crumbs, sugar, and melted butter. Stir until the crumbs feel like wet sand. Press the mixture firmly into the bottom of the springform pan to form an even layer.
Bake the Crust
Place the pan on a baking sheet and bake for 10 minutes. Remove and let it cool while you prepare the filling. Keep the oven on.
Beat the Cream Cheese
In a large bowl, beat the softened cream cheese with an electric mixer until smooth and creamy. Scrape down the sides to avoid lumps.
Add Sugar and Vanilla
Add the granulated sugar and vanilla extract. Beat again until well combined. The mixture should look fluffy and smooth.
Mix in Eggs One at a Time
Crack in the eggs one at a time, beating on low speed after each addition. Avoid overmixing at this stage to prevent cracking later.
Finish with Sour Cream and Heavy Cream
Gently blend in the sour cream and heavy cream until just combined. The batter should be silky but not overly whipped.
Pour Filling and Prepare Water Bath
Pour the cheesecake batter over the cooled crust. Place the springform pan into a large roasting pan. Fill the roasting pan with hot water until it reaches halfway up the sides of the springform.
Bake Until Set
Bake for 60–70 minutes or until the center jiggles slightly when nudged. The edges should look set but not browned. Turn off the oven and crack the door open.
Cool Gradually
Let the cheesecake sit in the oven for 1 hour. Then transfer it to a cooling rack. Once it reaches room temperature, cover and chill in the fridge for at least 6 hours or overnight.
Prepare the Chocolate Covered Strawberries
Melt chocolate chips with coconut oil in a small saucepan over low heat. Dip clean, dry strawberries into the melted chocolate and place them on parchment paper to set.
Decorate the Cheesecake
Once fully chilled, remove the cheesecake from the springform pan. Arrange chocolate-dipped strawberries on top. Drizzle extra chocolate over the top if desired.
Slice and Serve
Run a sharp knife under warm water before slicing for clean cuts. Serve chilled and enjoy the mix of creamy, fruity, and chocolaty goodness in every bite.
Sure! Here’s a helpful Storage and Serving Tips section with a cozy, clear tone:
Storage and Serving Tips
Cheesecake tastes best after it’s had plenty of time to chill, and this one is no exception. Once fully cooled and topped with strawberries, keep it covered and refrigerated. The flavors deepen overnight, and the texture sets just right.
Storage Tips:
- Store leftovers in an airtight container or wrap the pan tightly with plastic wrap.
- Keep in the fridge for up to 5 days.
- For longer storage, freeze individual slices wrapped in plastic wrap and foil for up to 1 month. Thaw overnight in the fridge before serving.
- Don’t freeze with strawberries on top. Add fresh ones after thawing.
Serving Tips:
- Slice with a sharp knife dipped in warm water and wiped clean between cuts.
- Serve cold or let it sit at room temperature for 10 minutes if you prefer a softer texture.
- Add extra chocolate drizzle or whipped cream for a festive touch.
FAQs
1. Can I use a different type of crust?
Yes, you can substitute the graham cracker crust with other options like an Oreo crust, almond flour crust, or a digestive biscuit crust for a different flavor or dietary preference.
2. Can I make the cheesecake ahead of time?
Absolutely! This cheesecake actually tastes better when it’s chilled overnight. Make it a day or two ahead, and it will be ready to serve when you need it.
3. Can I use frozen strawberries for the topping?
Fresh strawberries work best for the topping, as they hold their shape better and offer a fresher taste. If using frozen, make sure to thaw and dry them completely before dipping in chocolate.
4. How do I prevent cracks in my cheesecake?
To avoid cracks, don’t overbeat the batter, and make sure your cream cheese is softened to room temperature. The water bath also helps ensure an even cook and minimizes cracking.
5. Can I make this cheesecake without the chocolate-covered strawberries?
Yes! You can skip the chocolate-covered strawberries and top it with fresh fruit, whipped cream, or even a fruit compote for a simpler version.
Conclusion
Chocolate-covered strawberry cheesecake combines the best of both worlds—rich, creamy cheesecake paired with the indulgent touch of chocolate and the freshness of strawberries. With simple ingredients and straightforward steps, this dessert brings elegance and flavor without the hassle. Perfect for special occasions or as a treat for yourself, it’s sure to impress anyone who takes a bite. Whether you serve it chilled for a refreshing finish or at room temperature for a softer texture, each slice promises a taste of pure indulgence. Enjoy!
Related Recipes