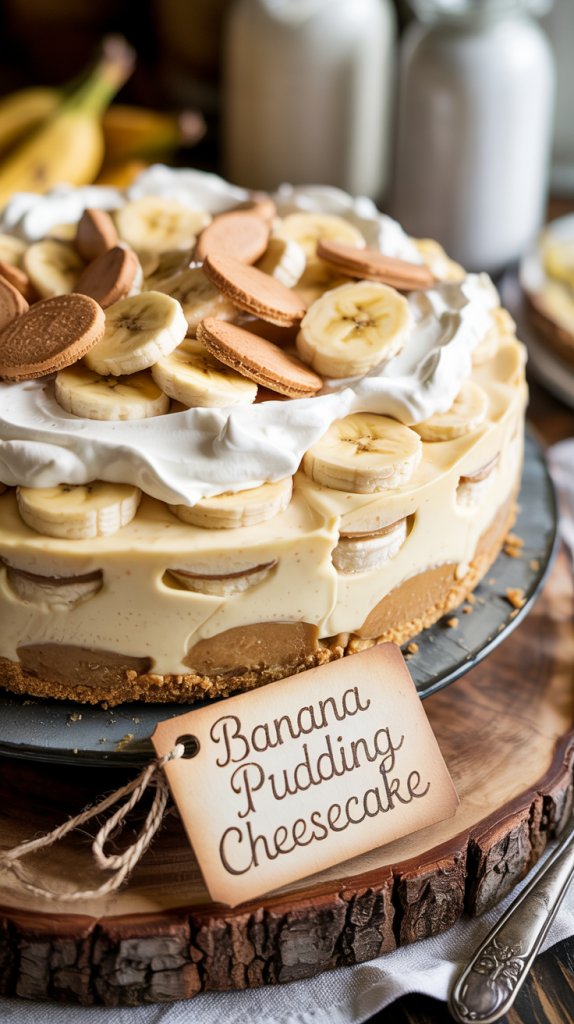
Banana pudding cheesecake no bake both bring comfort in every bite, but blending them into one creamy, dreamy dessert takes indulgence to a whole new level. This no-bake banana pudding cheesecake is smooth, rich, and layered with nostalgic flavor that reminds you of grandma’s kitchen with a modern twist. The best part? No oven required. This treat combines the familiar sweetness of bananas, velvety cream cheese, and the soft crunch of vanilla wafers into a chilled, sliceable masterpiece. Every layer brings texture and flavor that perfectly complement each other, making it a showstopper for potlucks, birthdays, or any casual sweet tooth moment. Whether you’re hosting friends or treating yourself after a long day, this dessert delivers both simplicity and wow factor. One bite in and you’ll understand why this recipe never leaves the table with leftovers. It’s not just a dessert—it’s a full-on banana cheesecake experience.

Ingredients Of Banana Pudding Cheesecake No Bake
For the Crust:
- 2 cups crushed vanilla wafer cookies (about 60 cookies)
- 1/2 cup unsalted butter, melted
- 2 tablespoons granulated sugar
For the Cheesecake Filling:
- 16 oz (2 packages) cream cheese, softened
- 1 cup powdered sugar
- 1 teaspoon pure vanilla extract
- 1 cup heavy whipping cream (cold)
- 1 box (3.4 oz) instant banana cream pudding mix
- 1 1/4 cups cold milk
For the Layers and Topping:
- 2-3 ripe bananas, sliced
- 1 1/2 cups whipped topping (like Cool Whip) or homemade whipped cream
- Extra vanilla wafers, for garnish
- Optional: caramel drizzle or banana chips for decoration
Essential Equipment
- 9-inch springform pan (for easy release and clean layers)
- Mixing bowls (at least two – one large, one medium)
- Electric hand mixer or stand mixer (for smooth, fluffy filling)
- Silicone spatula (for folding and scraping)
- Measuring cups and spoons
- Food processor or zip-top bag and rolling pin (to crush vanilla wafers)
- Whisk (for mixing pudding)
- Knife and cutting board (for slicing bananas)
- Offset spatula or back of a spoon (to smooth layers)
- Plastic wrap or foil (to cover the cheesecake while it chills)
- Serving plate or cake stand (for presentation)
Everything on this list helps keep prep smooth and stress-free, so you can focus on flavor and fun. Ready for the step-by-step instructions next?
Step By Step Guide
Step 1: Prepare the Crust
Crush vanilla wafers using a food processor until they become fine crumbs. If you don’t have one, place the cookies in a zip-top bag and crush them with a rolling pin. Transfer the crumbs to a bowl, add the granulated sugar, and pour in the melted butter. Mix until everything is well combined and resembles wet sand.
Step 2: Press the Crust Into the Pan
Pour the crumb mixture into a 9-inch springform pan. Use the back of a spoon or the bottom of a glass to press the crust firmly and evenly into the bottom. Make sure it’s compacted well to avoid crumbling later. Place the pan in the fridge to set while you prepare the filling.
Step 3: Whip the Heavy Cream
In a clean bowl, beat the cold heavy whipping cream using an electric hand mixer or stand mixer until stiff peaks form. This usually takes about 3–4 minutes on medium-high speed. Set the whipped cream aside—this will give your cheesecake filling a light, airy texture.
Step 4: Make the Banana Pudding Mixture
In another bowl, whisk together the banana cream instant pudding mix and cold milk. Whisk vigorously for about 2 minutes until it thickens slightly. Let it sit for 3–5 minutes to fully thicken into a creamy pudding.
Step 5: Beat the Cream Cheese Mixture
In a large bowl, beat softened cream cheese with powdered sugar and vanilla extract until completely smooth and fluffy. Scrape down the sides of the bowl to avoid lumps. The smoother this base, the better the final texture.
Step 6: Combine Pudding with Cream Cheese
Add the prepared banana pudding into the cream cheese mixture. Beat on low to medium speed until fully blended. This step gives your cheesecake that signature banana pudding flavor while keeping it rich and smooth.
Step 7: Fold in Whipped Cream
Using a spatula, gently fold the whipped cream into the banana cheesecake filling. Fold slowly and carefully to maintain the light texture. Avoid over-mixing to keep the filling airy and fluffy.
Step 8: Layer the Filling and Bananas
Remove the chilled crust from the fridge. Spoon half of the cheesecake filling over the crust and smooth it out. Arrange a layer of fresh banana slices over the filling. Add the remaining filling on top and smooth the surface with an offset spatula or the back of a spoon.
Step 9: Chill the Cheesecake
Cover the cheesecake with plastic wrap or foil and refrigerate it for at least 6 hours or overnight. This chilling time allows the filling to firm up and the flavors to blend beautifully. Do not rush this step—it’s essential for the cheesecake to hold its shape.
Step 10: Garnish and Serve
Once set, carefully release the cheesecake from the springform pan. Top it with whipped topping or homemade whipped cream. Garnish with extra banana slices, whole vanilla wafers, or a drizzle of caramel sauce for a stunning finish. Slice and serve cold for best flavor and texture.
Storage Tips
Refrigerate Immediately
Store the cheesecake in the refrigerator as soon as it’s made and chilled. Keep it covered tightly with plastic wrap or place it in an airtight container to prevent it from absorbing other odors.
Keep It Cold
Because this cheesecake is no-bake and contains fresh bananas and dairy, always keep it refrigerated until ready to serve. It stays fresh for up to 3-4 days in the fridge.
Avoid Freezing Fresh Bananas
Freezing can cause bananas to become mushy and watery when thawed, which may affect the texture and appearance of your cheesecake. If you want to freeze leftovers, consider removing fresh banana slices beforehand.
Freezing the Cheesecake
If freezing is necessary, wrap the cheesecake tightly in plastic wrap and then in aluminum foil to avoid freezer burn. Freeze for up to 1 month. Thaw overnight in the fridge before serving, but note the texture may slightly change.
Serve Chilled
For best taste and texture, slice and serve the cheesecake cold directly from the fridge. Letting it sit out too long will soften the layers and may cause the bananas to brown.
Frequently Asked Questions (FAQs)
1. Can I use another type of cookie for the crust?
Yes! Graham crackers or shortbread cookies make great alternatives. Just crush them finely and mix with melted butter like the vanilla wafers.
2. How ripe should the bananas be?
Choose bananas that are ripe but not overly mushy. Firm bananas hold their shape better in the layers and taste sweeter without being brown.
3. Can I make this cheesecake ahead of time?
Absolutely. It actually tastes better after chilling overnight, allowing flavors to meld and the cheesecake to set firmly.
4. Is it possible to make this dessert dairy-free?
Yes, you can substitute cream cheese and whipped cream with dairy-free alternatives like vegan cream cheese and coconut whipped topping.
5. How long can I store the cheesecake in the fridge?
Store it covered for up to 3-4 days. Fresh bananas mean it’s best enjoyed sooner rather than later to avoid browning.
Conclusion
This no-bake banana pudding cheesecake combines two classic desserts into one irresistibly creamy and flavorful treat. Easy to prepare, it requires minimal effort while delivering maximum satisfaction with every bite. Perfect for warm days or any occasion where you want a fuss-free, delicious dessert, it stays fresh in the fridge for several days and offers plenty of room for customization. Whether sharing with friends or enjoying a quiet moment yourself, this cheesecake promises smiles and sweet memories — all without turning on the oven.
Related Recipes