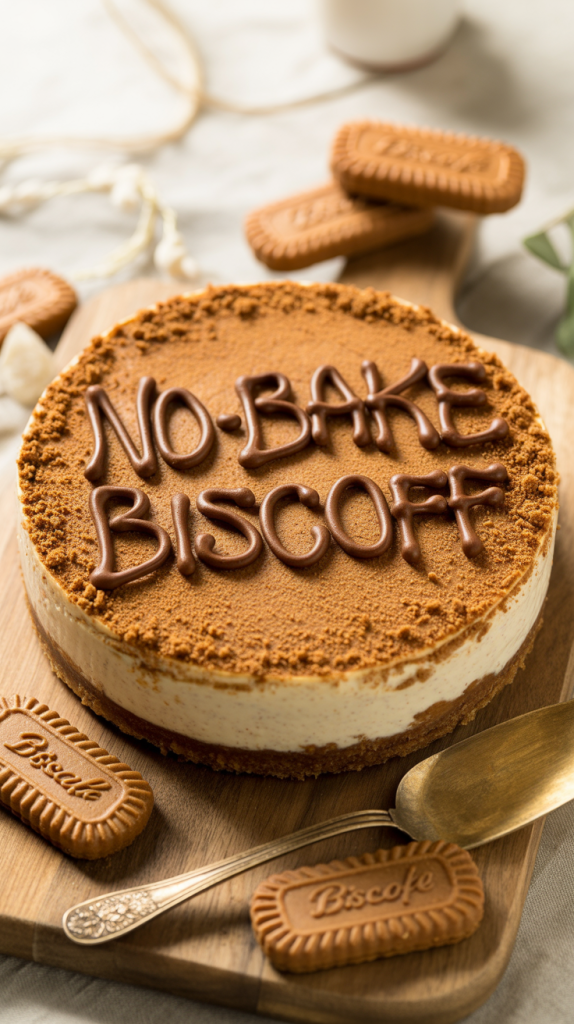
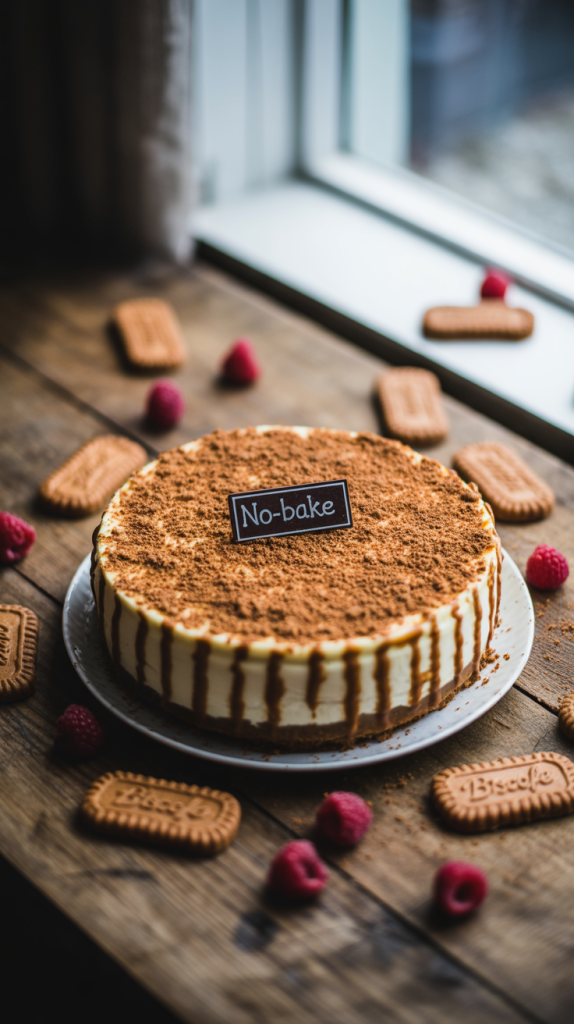
This no-bake Biscoff cheesecake delivers rich, velvety layers of indulgence in every slice. Creamy cheesecake filling meets a buttery Biscoff cookie crust, all topped with a luscious cookie butter drizzle that steals the spotlight. The balance of sweet and spiced flavors makes it an irresistible treat for cookie lovers and dessert enthusiasts alike. No need to preheat the oven or fuss with complicated steps—just mix, chill, and enjoy. Perfect for warm days, last-minute guests, or when the craving for something extraordinary hits hard. The smooth texture, paired with the signature taste of speculoos cookies, creates a memorable dessert that leaves everyone reaching for seconds. Whether for birthdays, brunch tables, or casual weekends, this cheesecake adds a delicious twist to any occasion. Simplicity meets sophistication, making it an easy favorite for those who love bold flavor without the baking.
Ingredients Of No-Bake Biscoff Cheesecake
For the crust:
- 2 cups Biscoff cookies (about 30 cookies), finely crushed
- 6 tablespoons unsalted butter, melted
For the cheesecake filling:
- 16 oz (450g) cream cheese, softened
- 1 cup powdered sugar
- 1 teaspoon vanilla extract
- 1 cup Biscoff cookie butter (spread)
- 1 cup heavy whipping cream, cold
For the topping:
- 1/3 cup Biscoff cookie butter, melted (for drizzling)
- A handful of crushed Biscoff cookies (for garnish)
- Whipped cream (optional, for serving)
Kitchen Tools Needed
- 9-inch springform pan (or pie dish)
- Food processor or rolling pin (for crushing cookies)
- Mixing bowls (medium and large)
- Hand mixer or stand mixer
- Rubber spatula or silicone spoon
- Measuring cups and spoons
- Small saucepan or microwave-safe bowl (for melting butter and cookie butter)
- Offset spatula or butter knife (for smoothing the top)
- Plastic wrap or foil (for chilling)
- Serving plate or cake stand (for presentation)
Step By Step Instructions
Step 1: Prepare Your Springform Pan
Line the bottom of a 9-inch springform pan with parchment paper for easy release. Lightly grease the sides if desired. This step ensures your cheesecake comes out cleanly and keeps the crust from sticking to the edges. A springform pan is essential—it allows for smooth removal without damaging the cake’s shape.
Step 2: Crush the Biscoff Cookies
Place the Biscoff cookies in a food processor and pulse until you get a fine crumb. If you don’t have a food processor, place the cookies in a ziplock bag and crush them with a rolling pin. Consistency matters here; you want a sand-like texture for a firm, even crust.
Step 3: Make the Cookie Crust
Pour the melted butter over the crushed cookies and mix until all crumbs are evenly coated. The mixture should resemble wet sand and hold together when pressed. Transfer it into the prepared pan and press firmly into an even layer using the back of a spoon or a flat-bottomed glass. Chill in the refrigerator for at least 20 minutes to set.
Step 4: Beat the Cream Cheese
In a large mixing bowl, beat the softened cream cheese using a hand mixer or stand mixer until smooth and lump-free. Scrape down the sides of the bowl regularly to ensure even mixing. This step is key to achieving a silky-smooth cheesecake texture.
Step 5: Add Sugar, Vanilla, and Cookie Butter
Add powdered sugar, vanilla extract, and Biscoff cookie butter to the cream cheese. Beat until everything is fully combined and the mixture becomes rich and creamy. The Biscoff adds depth and warmth, enhancing the cheesecake’s flavor profile beautifully.
Step 6: Whip the Heavy Cream Separately
In another chilled bowl, whip the cold heavy cream until stiff peaks form. Use a clean whisk or mixer attachments for best results. The whipped cream helps lighten the filling, giving the cheesecake a fluffy yet rich mouthfeel.
Step 7: Fold the Whipped Cream into the Filling
Gently fold the whipped cream into the cookie butter cream cheese mixture. Do this in stages, using a spatula, with slow and deliberate motions. Avoid overmixing—you want to keep the air in the whipped cream to maintain a light, mousse-like consistency.
Step 8: Fill the Crust with Cheesecake Mixture
Transfer the cheesecake filling into the chilled crust. Smooth the top with an offset spatula or the back of a spoon. Take your time to level the surface, especially along the edges, to give the cheesecake a clean, professional finish.
Step 9: Chill to Set
Cover the pan with plastic wrap or foil and refrigerate for at least 6 hours, or preferably overnight. The cold temperature firms up the filling, allowing it to slice cleanly. Patience is important here—a properly set cheesecake holds its shape and tastes even better the next day.
Step 10: Decorate and Serve
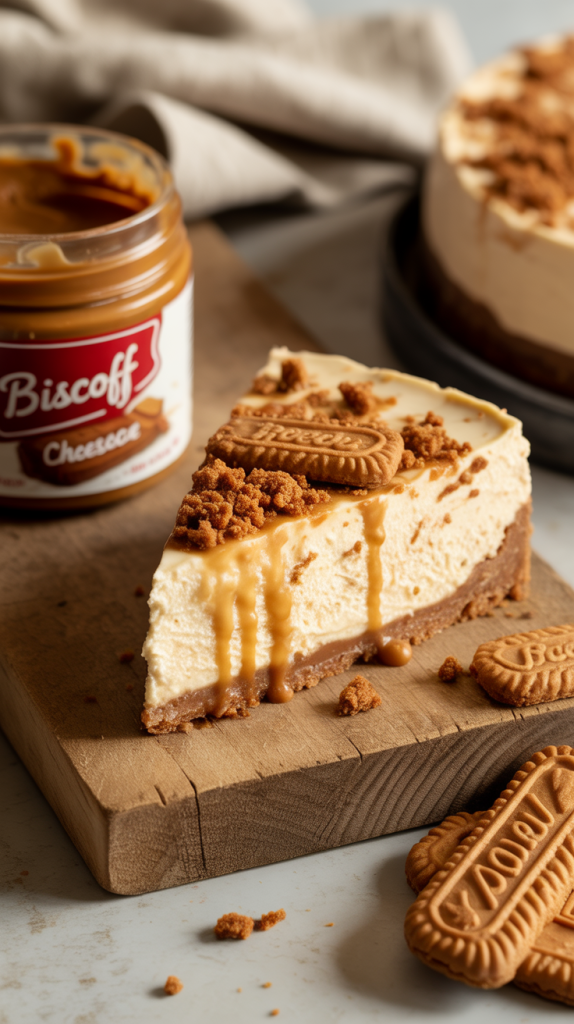
Before serving, drizzle melted Biscoff cookie butter over the top and sprinkle with crushed cookies for added texture and visual appeal. You can also pipe on whipped cream for a bakery-style presentation. Carefully release the springform and transfer the cheesecake to a serving platter. Slice with a hot, clean knife for perfect edges.
Serving Tips
1. Chill Before Slicing
Always serve this cheesecake chilled. Let it rest in the fridge until the moment you’re ready to plate it. A well-chilled cheesecake holds its shape better and enhances the creamy texture.
2. Use a Hot Knife for Clean Slices
Dip a sharp knife in hot water, wipe it dry, and then slice. Repeat this between each cut. This technique creates sharp, clean edges and prevents the filling from sticking to the blade.
3. Add Fresh Whipped Cream
Top each slice with a dollop of lightly sweetened whipped cream to add extra richness and balance the sweetness of the Biscoff.
4. Pair with Coffee or Tea
A strong cup of espresso or a spiced chai pairs beautifully with the warm, caramelized notes of Biscoff, making it a perfect dessert for casual or formal settings.
5. Serve on Chilled Plates
Chilled dessert plates help maintain the cheesecake’s texture, especially in warmer climates or during outdoor events.
6. Garnish Right Before Serving
Drizzle melted cookie butter and add crushed Biscoff cookies just before serving. This keeps the topping from absorbing moisture and losing its crunch.
7. Slice Smaller Portions
This cheesecake is rich and indulgent. Smaller slices are more manageable and leave room for second helpings without overwhelming your guests.
Frequently Asked Questions
1. Can I make this cheesecake ahead of time?
Yes! This no-bake cheesecake is perfect for preparing in advance. Make it a day before serving and keep it refrigerated. It actually tastes better after chilling overnight, as the flavors settle and the texture firms up.
2. Can I freeze the cheesecake?
You can freeze it. Wrap it tightly in plastic wrap and foil, then freeze for up to one month. Thaw in the refrigerator overnight before serving. Add toppings after thawing to keep them fresh and crisp.
3. What if I don’t have a springform pan?
You can use a deep pie dish or a square baking dish lined with parchment. While it may not look exactly the same, it will still taste amazing. Just scoop or cut the slices more carefully.
4. Can I use a different cookie for the crust?
Yes, graham crackers or digestive biscuits work well too. But keep in mind, Biscoff cookies give this cheesecake its signature flavor. Substituting will change the taste, though the texture will still be good.
5. How long does it last in the fridge?
Stored in an airtight container or covered in plastic wrap, the cheesecake stays fresh in the refrigerator for up to 4–5 days. The crust may soften slightly, but the flavor remains rich and satisfying.
Conclusion
No-bake Biscoff cheesecake brings together rich, creamy indulgence and effortless elegance—no oven required. With its spiced cookie crust, smooth cookie butter filling, and indulgent drizzle, it’s a guaranteed showstopper at any gathering. Whether you’re preparing for a party, a cozy night in, or just treating yourself, this dessert offers both simplicity and sophistication in every bite. Easy to prepare, even easier to love—this cheesecake belongs in every dessert rotation. Give it a try and watch it disappear slice by slice.
Related Recipes