
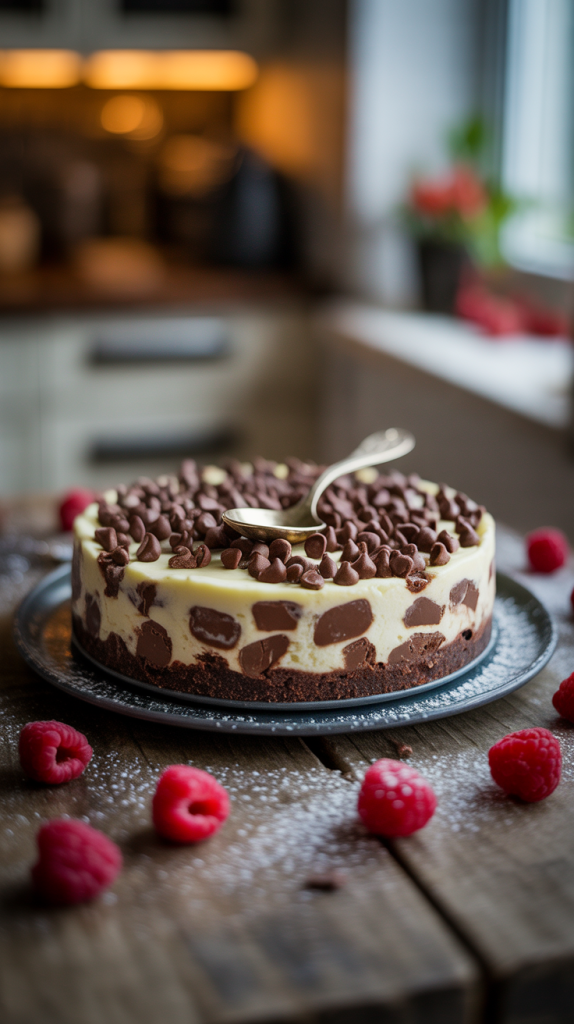
Craving a cheesecake that brings all the indulgence without the oven drama? This no-bake chocolate chip cheesecake hits the sweet spot with ease and charm. Creamy, rich, and loaded with melty chocolate chips, it delivers that perfect balance of decadent and refreshing. A buttery graham cracker crust anchors the dessert, giving every slice a satisfying crunch beneath the silky filling.
No oven time means less fuss and more flavor. Just whip, fold, chill, and dive into dessert heaven. Whether it’s a weekend treat or a crowd-pleaser for a party, this cheesecake always steals the spotlight. Kids love the chocolatey surprise, and adults appreciate the no-fail simplicity.
You don’t need special skills or fancy tools—just a few quality ingredients and a bit of patience while it chills. Once it sets, every forkful tells a story of sweet success and creamy joy. Dessert doesn’t get more effortless than this.
Ingredients
For the Crust:
- 1 ½ cups graham cracker crumbs
- ¼ cup granulated sugar
- ½ cup unsalted butter, melted
For the Cheesecake Filling:
- 16 oz (2 blocks) cream cheese, softened
- ¾ cup powdered sugar
- 1 tsp pure vanilla extract
- 1 ½ cups heavy whipping cream (cold)
- 1 cup mini semi-sweet chocolate chips
Optional Toppings:
- Extra mini chocolate chips
- Whipped cream
- Chocolate syrup drizzle
Kitchen Tools Needed
- 9-inch springform pan (or a deep pie dish)
- Mixing bowls (at least 2 – medium and large)
- Electric hand mixer or stand mixer
- Rubber spatula or silicone scraper
- Measuring cups and spoons
- Offset spatula or butter knife (for smoothing the top)
- Whisk (for optional hand mixing)
- Food processor or rolling pin (for crushing graham crackers)
- Plastic wrap or aluminum foil (for chilling)
- Serving plate or cake lifter (for presentation)
Step By Step Guide Of No-Bake Chocolate Chip Cheesecake
Step 1: Prepare the Graham Cracker Crust
Crush the graham crackers into fine crumbs using a food processor. If you don’t have one, place them in a sealed bag and crush with a rolling pin. Pour the crumbs into a bowl, add the granulated sugar, and stir to combine. Pour in the melted butter and mix until the texture resembles wet sand. Press this mixture firmly into the bottom of a 9-inch springform pan, making sure to spread it evenly. Place the pan in the fridge to set while you work on the filling.
Step 2: Soften the Cream Cheese Properly
Let the cream cheese sit at room temperature for about 30 minutes. This makes it much easier to beat into a smooth, creamy texture. Trying to mix it while cold can leave you with a lumpy filling, so patience here pays off with a silky result.
Step 3: Beat the Cream Cheese and Sugar
In a large mixing bowl, beat the softened cream cheese using a hand mixer or stand mixer on medium speed until it turns smooth and fluffy. Add the powdered sugar and continue beating until the mixture is fully blended and lump-free. Scrape down the sides of the bowl as needed to ensure even mixing.
Step 4: Add Vanilla and Mix Until Smooth
Pour in the vanilla extract and beat again until it’s fully incorporated. The vanilla gives your cheesecake that classic flavor and balances the richness of the cream cheese. You should now have a silky, slightly thick base that’s not too stiff or runny.
Step 5: Whip the Heavy Cream Separately
In a separate bowl, pour in the cold heavy whipping cream. Beat on high speed until stiff peaks form. You’ll know it’s ready when the cream holds its shape on the beaters without collapsing. Don’t over-whip, or it might turn into butter. This step adds lightness and volume to the cheesecake filling.
Step 6: Fold the Whipped Cream into the Cheesecake Base
Using a rubber spatula, gently fold the whipped cream into the cream cheese mixture. Do this in small batches and take your time. The goal is to blend everything smoothly without deflating the whipped cream. This creates a light, airy texture that sets beautifully in the fridge.
Step 7: Stir in the Mini Chocolate Chips
Add the mini chocolate chips and gently fold them in. Make sure they’re evenly distributed throughout the filling so that every slice has that perfect balance of crunch and creaminess. Don’t overmix—just enough to combine.
Step 8: Fill, Chill, and Serve
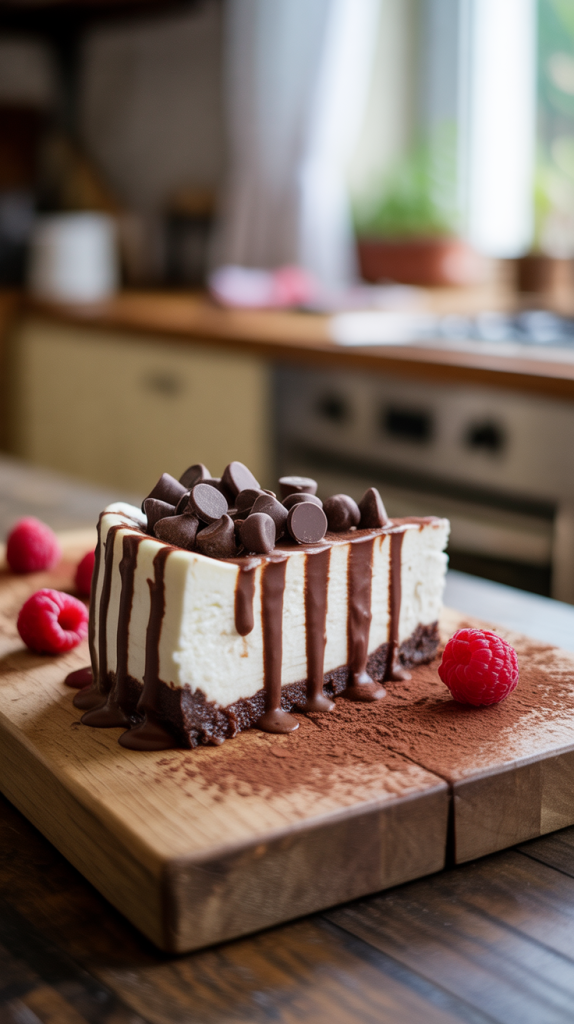
Spoon the cheesecake filling onto the prepared crust and smooth the top with an offset spatula or the back of a spoon. Cover the pan tightly with plastic wrap and refrigerate for at least 6 hours, preferably overnight. Once set, carefully remove the cheesecake from the springform pan. Garnish with extra chocolate chips, whipped cream, or a drizzle of chocolate syrup. Slice and serve chilled!
Tips & Tricks
- Use room-temperature cream cheese
Cold cream cheese will clump and make the filling grainy. Always let it soften for at least 30 minutes before mixing. - Whip the cream until stiff peaks form
Soft peaks won’t hold up well in the filling. Whipping until stiff peaks gives your cheesecake a stable, airy structure. - Press the crust firmly and evenly
Use the bottom of a glass or measuring cup to pack the crust tightly. This helps prevent it from crumbling when sliced. - Chill for a full 6–8 hours or overnight
Don’t rush the chill time. The longer it sets, the firmer and more sliceable the cheesecake will be. - Fold gently to keep it fluffy
Mixing too hard after adding whipped cream can deflate the air and make the texture dense. Use a spatula and light strokes. - Try flavored chips
Mini dark, white chocolate, or even caramel chips can be swapped in for a fun twist. - Slice with a hot knife
Dip your knife in hot water and wipe it clean between each slice for clean, bakery-style cuts.
FAQs
How long does no-bake chocolate chip cheesecake last in the fridge?
It stays fresh for up to 5 days when stored in an airtight container or wrapped tightly with plastic wrap. Keep it refrigerated at all times for the best texture and flavor.
Can I freeze this cheesecake?
Yes, you can freeze it! Wrap it tightly in plastic wrap and aluminum foil, then freeze for up to 2 months. Thaw it in the fridge overnight before serving.
Can I use regular chocolate chips instead of mini ones?
Mini chips are recommended because they distribute better in the creamy filling. Regular chips can be used, but they may sink or create uneven texture.
What can I use instead of graham crackers for the crust?
Try crushed Oreos, digestive biscuits, or vanilla wafers. Just adjust the butter amount slightly based on how dry the crumbs are.
Why didn’t my cheesecake set properly?
Most likely, the whipped cream wasn’t stiff enough, or it didn’t chill long enough. Make sure to whip the cream to stiff peaks and chill for at least 6 hours—overnight is ideal.
Conclusion
No-bake chocolate chip cheesecake blends creamy indulgence with chocolatey crunch—all without ever turning on the oven. It’s simple enough for beginners yet impressive enough to wow any dessert table. With a buttery graham crust, rich filling, and flecks of chocolate in every bite, this cheesecake proves you don’t need heat to create something magical. Just whip, chill, slice, and smile. Perfect for holidays, birthdays, or just treating yourself right.
Related Recipes