
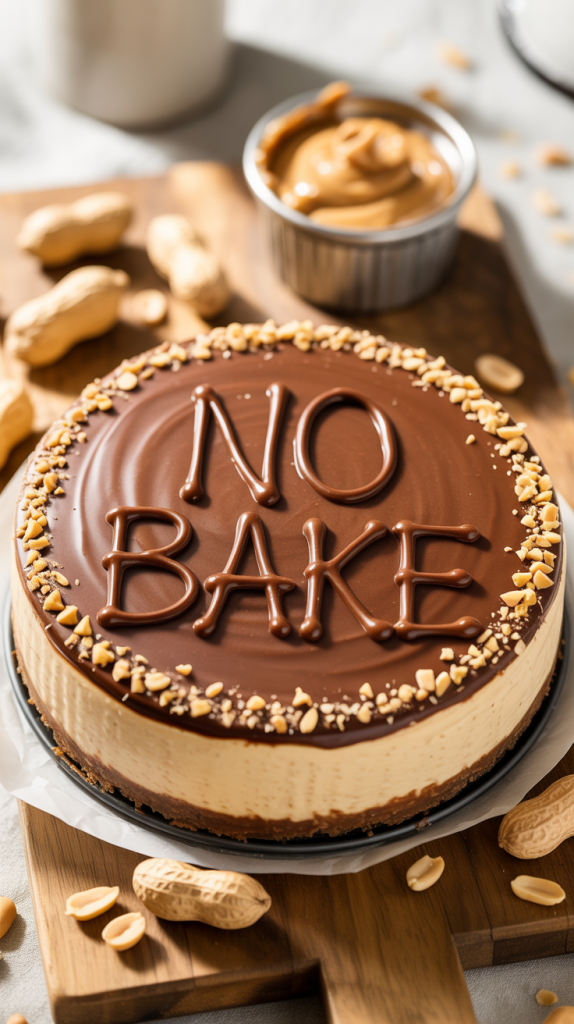
Sinking your fork into a slice of rich, creamy peanut butter cheesecake feels like a celebration. This no-bake wonder combines everything people love about peanut butter desserts with the silky smoothness of a cheesecake—without turning on the oven. Each bite delivers a perfect balance of salty and sweet, nestled over a buttery graham cracker crust that brings it all together.
The magic begins with cream cheese whipped until fluffy, then folded into sweet peanut butter and light whipped topping. The filling sets like a dream in the fridge, making it ideal for warm days, busy schedules, or last-minute dessert plans. No water baths. No fuss. Just decadent flavor in every creamy layer.
Serve this beauty at your next gathering or keep it all for yourself—no judgment here. Once you taste it, you’ll wonder how such a simple dessert steals the show every time.
Ingredients
For the Crust:
- 1 ½ cups graham cracker crumbs
- ¼ cup granulated sugar
- ½ cup unsalted butter, melted
For the Filling:
- 1 cup creamy peanut butter (not natural or oily)
- 16 oz (2 packages) cream cheese, softened
- 1 cup powdered sugar
- 1 tsp vanilla extract
- 1 ½ cups whipped topping (like Cool Whip), thawed
Optional Toppings:
- Crushed peanuts
- Melted chocolate drizzle
- Mini peanut butter cups or chocolate chips
- Whipped cream swirls
Equipment Needed
To make this indulgent no-bake dessert, gather the following tools:
- 9-inch springform pan – Essential for easy release and a beautiful presentation.
- Mixing bowls – One large for the filling, one small for the crust.
- Electric hand mixer or stand mixer – Helps create a smooth, fluffy filling with minimal effort.
- Rubber spatula – Ideal for scraping down the bowl and evenly spreading the filling.
- Measuring cups and spoons – Accurate measurements make all the difference.
- Flat-bottom glass or measuring cup – Great for pressing the crust firmly into the pan.
- Offset spatula (optional) – Makes the cheesecake surface smooth and picture-perfect.
- Plastic wrap or aluminum foil – For covering the cheesecake during chilling.
Step-by-Step Guide to Make No Bake Peanut Butter Cheesecake

Step 1: Prepare Your Workstation
Clean your workspace and lay out all your ingredients and tools. Take the cream cheese and whipped topping out of the fridge to let them soften and thaw properly. This step helps the filling blend smoothly without lumps.
Step 2: Make the Graham Cracker Crust
In a medium mixing bowl, combine 1 ½ cups of graham cracker crumbs with ¼ cup of granulated sugar. Pour in ½ cup of melted butter and stir until the mixture resembles wet sand. Every crumb should be coated evenly with butter to help it bind together.
Step 3: Press the Crust into the Pan
Pour the crust mixture into a 9-inch springform pan. Use the bottom of a flat measuring cup or a glass to press the crumbs firmly into an even layer, covering the bottom completely. Place the pan in the fridge to chill while you make the filling.
Step 4: Beat the Cream Cheese
In a large mixing bowl, add 16 oz of softened cream cheese. Use an electric mixer on medium speed to beat it for 2–3 minutes until it’s completely smooth and fluffy. This creates the base for a silky cheesecake texture.
Step 5: Add Peanut Butter and Vanilla
Add 1 cup of creamy peanut butter and 1 teaspoon of vanilla extract to the whipped cream cheese. Mix on medium speed until the ingredients are fully incorporated, and the mixture looks thick, smooth, and light brown.
Step 6: Blend in the Powdered Sugar
Gradually sift in 1 cup of powdered sugar while mixing on low speed. This step sweetens the filling and helps maintain its structure. Increase the speed to medium-high for 1 more minute to eliminate any clumps and to create a fluffy texture.
Step 7: Fold in the Whipped Topping
Using a rubber spatula, gently fold in 1 ½ cups of thawed whipped topping. Don’t use the mixer here—fold by hand in slow, circular motions. This keeps the filling light and airy instead of dense or overmixed.
Step 8: Fill the Cheesecake Pan
Take the springform pan with the crust from the fridge. Spoon the peanut butter cheesecake filling over the chilled crust. Use an offset spatula or the back of a spoon to spread the filling evenly to the edges and smooth the top.
Step 9: Chill the Cheesecake
Cover the pan tightly with plastic wrap or aluminum foil. Place the cheesecake in the refrigerator for at least 6 hours, preferably overnight. This chill time helps the filling firm up and develop that classic, creamy cheesecake consistency.
Step 10: Decorate and Serve
Once set, carefully remove the cheesecake from the springform pan. Top with crushed peanuts, a drizzle of melted chocolate, mini peanut butter cups, or whipped cream—anything you love. Slice with a warm knife for clean cuts and serve chilled for best texture and flavor.
Serving Tips
1. Chill Before Serving:
Always serve this cheesecake chilled straight from the fridge. The texture is best when firm and creamy—not room temperature. If it’s been out for more than 30 minutes, pop it back in the fridge for a bit.
2. Use a Hot Knife for Clean Slices:
Dip a sharp knife in hot water and wipe it dry before each slice. This ensures clean, professional-looking cuts without dragging the filling.
3. Garnish Right Before Serving:
Top the cheesecake just before serving to keep everything looking fresh. Whipped cream, chocolate shavings, crushed peanuts, or mini peanut butter cups add a beautiful and tasty touch.
4. Pair with Beverages:
Serve alongside coffee, cold milk, or even a sweet dessert wine. The rich peanut butter flavor pairs beautifully with bold or creamy drinks.
5. Serve on Chilled Plates (Optional):
For an elegant presentation and longer-lasting chill, place serving plates in the freezer for 10 minutes before plating. It keeps each slice cool and neat longer.
Tips & Tricks
1. Use Full-Fat Ingredients:
Full-fat cream cheese and whipped topping give the cheesecake a rich, creamy texture. Low-fat alternatives can result in a softer, runnier filling that doesn’t hold its shape well.
2. Soften Cream Cheese Properly:
Leave the cream cheese out for at least 30–45 minutes before mixing. Soft cream cheese blends more easily and creates a smooth, lump-free filling.
3. Avoid Natural Peanut Butter:
Stick to processed peanut butter like Jif or Skippy for this recipe. Natural peanut butter tends to separate and can make the filling oily or unstable.
4. Don’t Skip Chilling Time:
The cheesecake needs a minimum of 6 hours in the fridge—overnight is even better. This ensures the filling sets properly and slices cleanly.
5. Use a Springform Pan:
A springform pan makes removing the cheesecake so much easier. It keeps the crust intact and gives you those clean edges that look bakery-made.
6. Line the Bottom for Easy Removal (Optional):
Place a round of parchment paper at the bottom of the pan before adding the crust. It makes transferring the finished cheesecake to a serving plate effortless.
7. Fold, Don’t Mix, the Whipped Topping:
Folding keeps air in the mixture and gives the cheesecake a light, mousse-like texture. Overmixing can deflate it and make it dense.
8. Freeze for Faster Setting (in a pinch):
Short on time? Place the cheesecake in the freezer for 2–3 hours to firm it up faster—but don’t forget to let it sit in the fridge for 30 minutes before serving for perfect texture.
FAQs
1. Can I use crunchy peanut butter instead of creamy?
Yes, but creamy peanut butter gives the filling a smoother texture. Crunchy peanut butter will add a nutty bite, which some people love, but it can make slicing less clean.
2. How long can I store this cheesecake in the fridge?
Store it in an airtight container or tightly wrapped in plastic wrap in the fridge for up to 5 days. It will stay fresh and delicious if kept chilled.
3. Can I freeze no-bake peanut butter cheesecake?
Absolutely. Wrap it tightly in plastic and aluminum foil, or store slices in airtight containers. Freeze for up to 1 month. Thaw in the refrigerator overnight before serving.
4. What can I use instead of graham crackers for the crust?
Try Oreo crumbs, crushed digestive biscuits, or vanilla wafers. You can even use pretzels for a sweet-salty twist that pairs beautifully with the peanut butter filling.
5. Can I make this dessert dairy-free?
Yes, but it requires substitutions. Use dairy-free cream cheese, a non-dairy whipped topping, and a dairy-free butter alternative. Choose a peanut butter brand that’s free of dairy additives.
Conclusion
No-bake peanut butter cheesecake is the perfect mix of creamy, sweet, and salty with zero oven time and maximum flavor. With simple ingredients and easy steps, it’s a go-to dessert for busy days, special occasions, or satisfying that peanut butter craving in the most indulgent way. Serve it chilled, share with friends—or keep it all to yourself. Either way, every bite will taste like a win.
Related Recipes