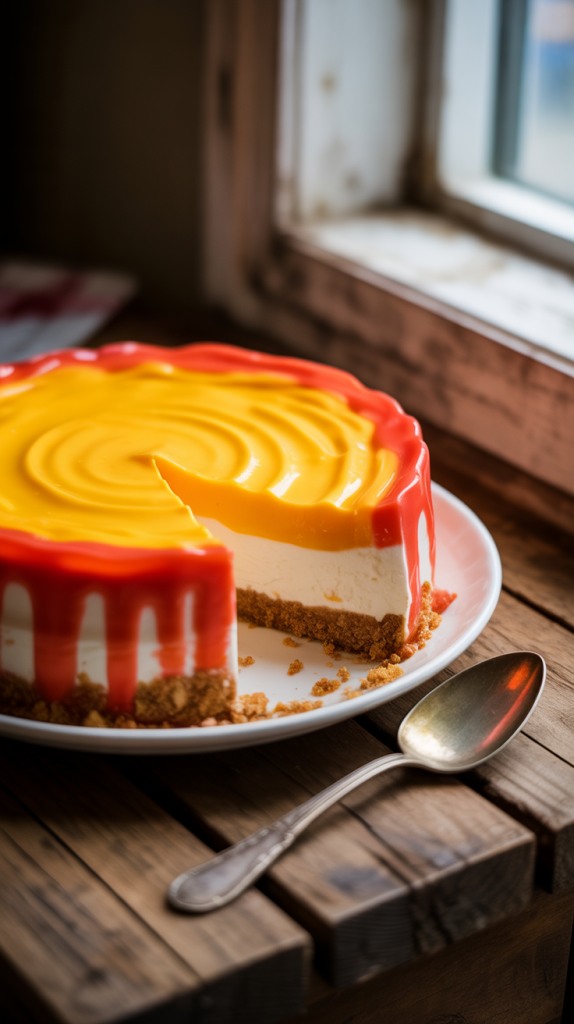
A dessert that saves time and still feels like a celebration? That’s exactly what you get with Jello no bake cheesecake. It comes together fast, sets like a dream, and tastes like you spent hours crafting it. Each bite delivers a velvety blend of creaminess with just the right amount of tang, resting on a buttery graham cracker crust. No oven, no stress, just pure dessert joy. Whether it’s a midweek treat or a last-minute addition to your dinner table, this cheesecake brings sweet satisfaction in the simplest way. The Jello mix takes care of the hard part—no worrying about water baths or cracked tops. All you need is a few ingredients, a mixing bowl, and a fridge. That’s dessert magic made easy. Grab a spoon, because this is one no-bake wonder you won’t want to share.

Ingredients
For the Crust:
- 1 ½ cups graham cracker crumbs
- ¼ cup granulated sugar
- 6 tablespoons unsalted butter, melted
For the Cheesecake Filling:
- 1 box (11.1 oz) JELL-O No Bake Classic Cheesecake Mix
- 1 ½ cups cold milk
- 2 tablespoons granulated sugar
- 1 teaspoon vanilla extract (optional, for extra flavor)
Optional Toppings:
- Fresh strawberries, blueberries, or raspberries
- Whipped cream
- Chocolate shavings or syrup
- Crushed graham crackers or nuts
Essential Tools:
- Mixing bowl – For combining the crust and filling
- Measuring cups and spoons – To get the right ingredient portions
- Spatula – For smooth mixing and scraping the bowl clean
- Whisk or hand mixer – To blend the filling until creamy
- 9-inch pie pan or springform pan – For shaping the cheesecake
- Flat-bottomed glass or spoon – To press the crust firmly into the pan
- Plastic wrap or lid – To cover the cheesecake while it chills
- Refrigerator – To let the cheesecake set properly
Optional but helpful:
- Food processor – For crushing graham crackers (if not using pre-crushed)
- Knife and cutting board – If you’re adding fresh fruit toppings
Step By Step Guide Jello No Bake Cheesecake
Step 1: Prepare the Graham Cracker Crust
Start by making the crust base. In a mixing bowl, combine 1 ½ cups of graham cracker crumbs and ¼ cup of granulated sugar. Pour in 6 tablespoons of melted butter and stir until the mixture resembles wet sand. The butter should coat every crumb so it presses firmly. Pour the crust mixture into a 9-inch pie pan or springform pan. Use the back of a spoon or a flat-bottomed glass to press it down evenly, covering the bottom and slightly up the sides. Place the pan in the refrigerator to set while you prepare the filling.
Step 2: Open the Jello Cheesecake Mix
Take out your JELL-O No Bake Cheesecake box. Inside, you’ll find two packets—one for the crust (already made) and one for the filling. Since you’ve made a fresh crust, set the crust packet aside. Open the cheesecake filling mix packet and pour it into a large mixing bowl. Make sure the bowl is clean and dry to help the mix set properly.
Step 3: Measure and Pour the Cold Milk
Measure out 1 ½ cups of cold milk—whole milk works best for creaminess. Pour the milk directly into the bowl with the cheesecake mix. Cold milk helps the filling thicken faster and prevents lumps. If you want a richer flavor, you can replace ½ cup of milk with heavy cream, but it’s optional.
Step 4: Add Sugar and Vanilla Extract
Sprinkle 2 tablespoons of granulated sugar into the mixture to enhance sweetness. Add 1 teaspoon of vanilla extract to give the cheesecake a warm, rich flavor. These additions take the boxed mix to a more homemade level. Stir briefly with a whisk to combine before mixing.
Step 5: Mix Until Thick and Creamy
Using a hand mixer or stand mixer, beat the filling mixture on medium speed for about 3 minutes. The texture should become thick, smooth, and creamy with no visible lumps. Stop the mixer and scrape down the sides of the bowl with a spatula to make sure everything is evenly mixed. Avoid overmixing, as this can thin the mixture.
Step 6: Pour the Filling Into the Crust
Take your crust out of the refrigerator. Pour the prepared cheesecake filling into the crust, using a spatula to spread it evenly. Smooth the top with the back of a spoon or offset spatula. The surface should be level and creamy without air bubbles or ridges. Give the pan a gentle tap on the counter to settle the filling.
Step 7: Chill to Set Properly
Cover the cheesecake pan with plastic wrap or a fitted lid, then place it in the refrigerator. Let it chill for at least 1 hour, though 2–3 hours gives the best firmness and texture. Avoid placing it in the freezer to speed things up, as this may affect the consistency and create ice crystals in the filling.
Step 8: Add Toppings and Serve
Once fully set, remove the cheesecake from the refrigerator. Carefully release it from a springform pan if using one. Top with fresh berries, whipped cream, chocolate syrup, or even crushed nuts depending on your preference. Slice with a warm knife for clean edges. Serve cold and enjoy the creamy, luscious flavor with every bite!
Serving Tips
1. Chill Before Slicing
Always let the cheesecake chill for at least 2–3 hours before serving. A well-chilled cheesecake holds its shape and slices cleanly without collapsing.
2. Use a Warm Knife
Dip your knife in hot water and wipe it dry before each slice. This helps cut through the creamy filling and crust smoothly without dragging or crumbling.
3. Dress It Up with Toppings
Add fresh fruits like strawberries, raspberries, or blueberries right before serving. For a decadent touch, drizzle chocolate syrup or caramel over the top. A swirl of whipped cream on each slice makes it extra inviting.
4. Plate Creatively
Serve each slice on a dessert plate with a dusting of cocoa powder or a mint leaf garnish. For parties, try individual servings in mini jars or cups.
5. Serve Cold, Not Frozen
Keep the cheesecake in the fridge until it’s time to serve. Avoid freezing before serving, as it can change the texture and make the crust soggy once thawed.
Tips and Tricks
1. Use Whole Milk for Creaminess
Skim or low-fat milk can make the filling too runny. Whole milk gives the best texture, and swapping in a bit of heavy cream makes it even richer.
2. Let the Crust Set First
Chill the crust for at least 15 minutes before adding the filling. A cold crust stays firm and prevents sogginess when the creamy layer is added.
3. Avoid Overmixing the Filling
Mix just until the filling thickens—about 3 minutes with a hand mixer. Overmixing can break down the structure and make it too loose.
4. Add Flavor Enhancers
Mix a teaspoon of lemon zest or a splash of almond extract into the filling for a custom twist that still keeps things simple.
5. Try Creative Crusts
Use crushed Oreos, chocolate wafers, or vanilla cookies instead of graham crackers for a fun flavor change.
6. Make Ahead for Events
Prepare the cheesecake a day in advance and keep it chilled. It sets better overnight and gives you more time to focus on your guests.
7. Don’t Freeze to Set
Freezing speeds up setting but ruins the creamy texture. Stick to refrigeration for the best results.
8. Level the Filling
Tap the pan gently on the counter after pouring the filling. This helps remove air bubbles and levels the top for a clean, bakery-style look.
FAQs
1. Can I make Jello no bake cheesecake without milk?
No, milk is essential for activating the cheesecake mix. For best results, use whole milk or a combination of whole milk and heavy cream. Plant-based alternatives like almond or oat milk won’t thicken the filling properly.
2. How long does it take for the cheesecake to set?
It typically takes 2 to 3 hours in the refrigerator to set fully. For the best texture, refrigerate it overnight if possible. Avoid using the freezer, as it can alter the creamy consistency.
3. Can I freeze Jello no bake cheesecake?
Freezing is not recommended for this type of cheesecake. It may affect the smooth texture and cause the crust to become soggy when thawed. Stick to refrigeration for storage.
4. How long does Jello no bake cheesecake last in the fridge?
Stored in an airtight container, it can last for up to 5 days in the refrigerator. Always keep it covered to prevent it from absorbing other odors or drying out.
5. Can I use homemade crust instead of the box mix?
Yes! A homemade crust made with graham cracker crumbs, sugar, and melted butter adds a fresh, buttery flavor. It also gives you the freedom to customize with different cookies or spices.
Conclusion
Jello No Bake Cheesecake proves that dessert doesn’t have to be complicated to taste amazing. With minimal ingredients and zero baking, you get a creamy, dreamy treat perfect for any occasion. Customize it with your favorite toppings, serve it chilled, and let it steal the show at your table. Whether you’re new to the kitchen or just short on time, this simple dessert delivers satisfaction in every slice.
Related Recipes