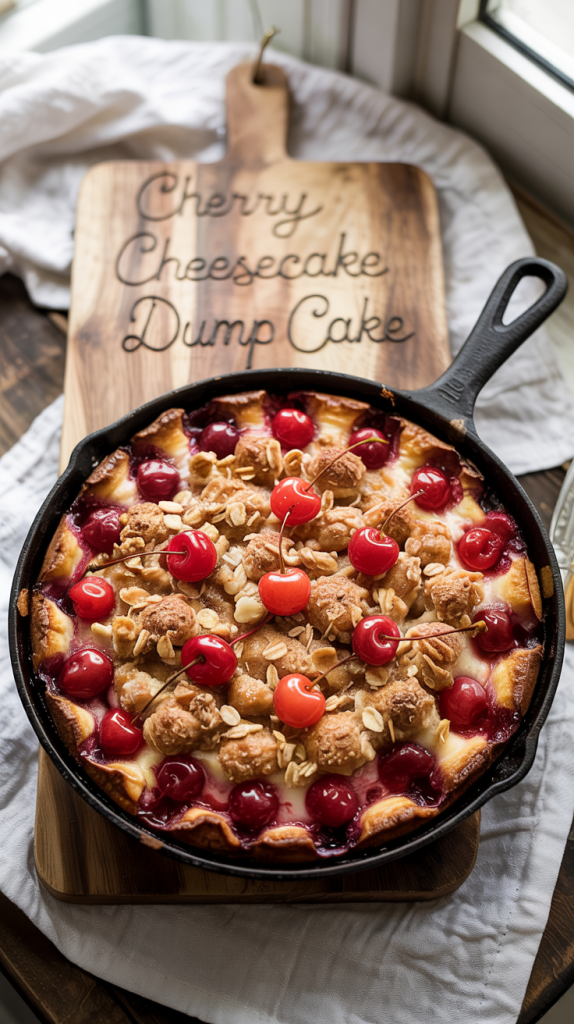
Craving a dessert that combines creamy cheesecake and the sweet burst of cherry in every bite? The Cherry Cheesecake Dump Cake delivers just that! This easy, no-fuss dessert requires minimal ingredients and effort, yet the result is a mouthwatering treat that will have everyone coming back for seconds. Perfect for busy days or casual gatherings, this dump cake offers the richness of cheesecake with the delicious fruitiness of cherries, all wrapped in a warm, golden cake topping. You don’t need fancy kitchen skills or hours of preparation—just dump the ingredients into a pan and let the oven work its magic. The best part? It’s versatile, so you can swap out cherries for other fruits or adjust the sweetness to your preference. A few simple steps, and you’ll have a dessert that looks and tastes like it took hours to make!
Ingredients for Cherry Cheesecake Dump Cake:
- 1 can (21 oz) cherry pie filling
- 1 package (8 oz) cream cheese, softened
- 1/2 cup sugar
- 1 teaspoon vanilla extract
- 1 box (15.25 oz) yellow cake mix
- 1/2 cup unsalted butter, melted
- 1/2 cup chopped nuts (optional, for added crunch)
- 1/4 cup powdered sugar (for dusting, optional)
These ingredients come together to create a delicious and easy dessert, with layers of creamy cheesecake, sweet cherry filling, and a golden cake topping.
Kitchen Tools and Equipment
- 9×13-inch baking dish
- Mixing bowls (for combining cream cheese, sugar, and vanilla)
- Electric mixer or hand whisk (to blend cream cheese and sugar)
- Spoon or spatula (for spreading and mixing ingredients)
- Measuring cups and spoons
- Can opener (for the cherry pie filling)
- Knife (for chopping nuts, if using)
- Oven mitts (for handling hot baking dish)
- Cooling rack (optional, for cooling after baking)
Step By Step Instruction To Make This Cake
1. Preheat the Oven
Start by preheating your oven to 350°F (175°C). This ensures that your oven reaches the perfect temperature for baking the Cherry Cheesecake Dump Cake. Allow the oven to fully preheat while you prepare the other ingredients.
2. Prepare the Baking Dish
Grease a 9×13-inch baking dish with butter or non-stick spray. This step prevents the cake from sticking to the dish and makes cleaning up easier once your cake is done. You can also line the dish with parchment paper for extra convenience.
3. Combine Cream Cheese, Sugar, and Vanilla
In a mixing bowl, combine the softened cream cheese, sugar, and vanilla extract. Use an electric mixer or a hand whisk to blend these ingredients together until smooth and creamy. This mixture creates the cheesecake-like layer that will be in the middle of the dump cake.
4. Spread the Cream Cheese Mixture
Once your cream cheese mixture is smooth, evenly spread it across the bottom of the prepared baking dish. Use a spatula to gently smooth it out, covering the base of the dish. Don’t worry about making it perfect—this layer will bake into the cake, creating a rich, creamy texture.
5. Add the Cherry Pie Filling
Open the can of cherry pie filling and spoon it over the cream cheese mixture. Spread it out evenly with a spoon or spatula, making sure the cherries are distributed well across the surface. This fruity layer adds the sweet and tart contrast that balances the richness of the cream cheese.
6. Sprinkle the Cake Mix
Take the box of yellow cake mix and sprinkle it evenly over the cherry pie filling. Make sure the mix covers the entire surface, but you don’t need to spread it out like frosting. The cake mix will bake into a crumbly topping, creating a golden, slightly crunchy texture.
7. Drizzle with Melted Butter
Pour the melted butter evenly over the cake mix. You don’t need to stir it in—just drizzle the butter over the dry cake mix, as it will melt into the batter during baking. The butter helps the cake topping form a golden, slightly crisp crust.
8. Add Nuts (Optional)
If you’re using nuts, sprinkle them over the top of the cake mix and butter. Chopped walnuts or pecans work particularly well, adding an extra layer of texture and flavor. This step is optional, but it can make the cake even more delicious and add a bit of crunch.
9. Bake the Dump Cake
Place the prepared baking dish into the preheated oven and bake for 40-45 minutes, or until the top is golden brown and bubbly. Check the cake halfway through to ensure it’s baking evenly. The cake mix should have fully cooked, and the fruit layer will be bubbly around the edges.
10. Cool and Serve
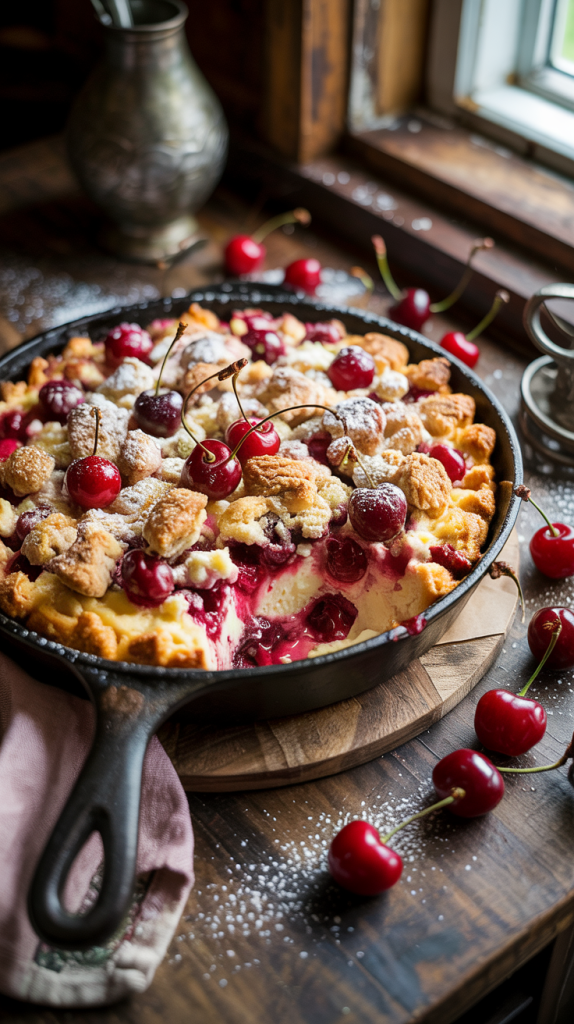
Once your Cherry Cheesecake Dump Cake is done, remove it from the oven and let it cool for about 10-15 minutes before serving. The dessert will be hot, so allow it to set slightly. If desired, dust the top with powdered sugar for an added touch of sweetness. Serve warm and enjoy the creamy, fruity layers!
Tips & Tricks for Perfect Cake
- Use Room Temperature Cream Cheese
Softening your cream cheese before mixing it with sugar and vanilla helps achieve a smooth and creamy texture. Cold cream cheese can lead to lumps, making it harder to blend with the other ingredients. - Customize the Fruit Filling
While cherry pie filling is the classic choice, feel free to experiment with other fruits like blueberry, strawberry, or mixed berries. Each fruit variation brings its own unique flavor and charm to the dump cake. - Add a Dash of Cinnamon or Almond Extract
For an extra layer of flavor, consider adding a teaspoon of cinnamon or almond extract to the cake mix or cream cheese filling. This subtle twist can elevate the overall taste without overpowering the other ingredients. - Don’t Stir the Cake Mix
When you add the cake mix, resist the urge to stir it into the cherry and cream cheese layers. The dry cake mix will create a crumbly topping during baking, so simply sprinkle it evenly for the best results. - Ensure Even Butter Distribution
Drizzle the melted butter as evenly as possible over the cake mix to avoid uneven cooking. You want the butter to seep into the cake mix and bake into a golden, crisp topping. If the butter pools in certain areas, it can affect the texture of the crust. - Use a High-Quality Cake Mix
A high-quality yellow cake mix will ensure a better texture and taste for your dump cake. Opt for a mix with minimal artificial ingredients to enhance the overall flavor profile. - Bake Until Golden Brown
Keep a close eye on the dump cake as it bakes. Once the top turns golden brown and the edges bubble, it’s ready. Overbaking can dry out the cake, while underbaking may leave the cake mix gooey in parts. - Let It Cool Before Serving
Allow the dump cake to cool for at least 10-15 minutes before serving. This resting time helps the layers set and makes it easier to slice and serve without the cake falling apart. - Pair with Whipped Cream or Ice Cream
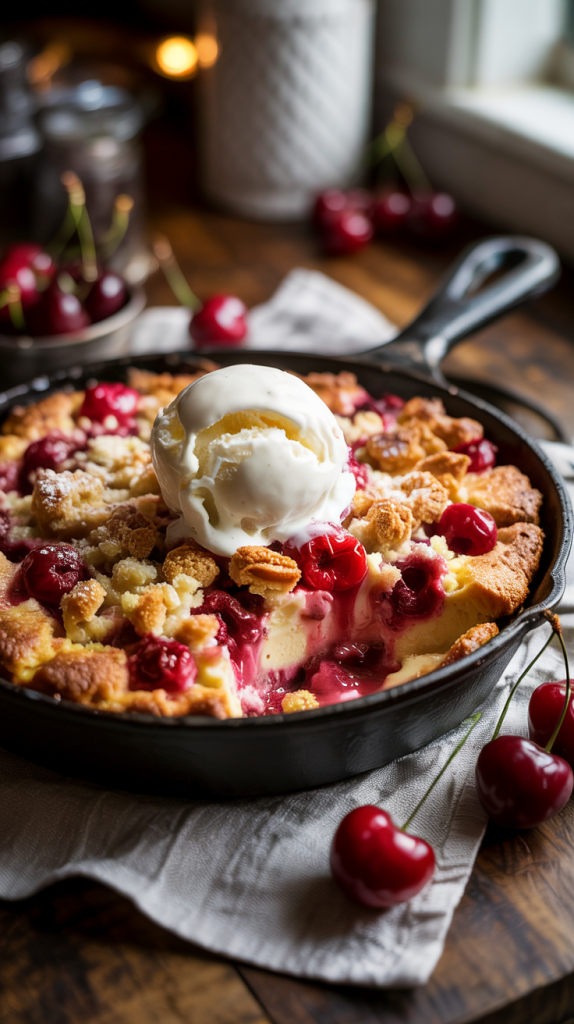
Elevate the dessert experience by serving your Cherry Cheesecake Dump Cake with a dollop of whipped cream or a scoop of vanilla ice cream. This addition complements the richness of the cheesecake and adds a creamy contrast to the fruit. - Store Leftovers Properly
If you have leftovers, store them in an airtight container in the fridge for up to 3-4 days. Reheat in the microwave for 20-30 seconds to enjoy the cake warm again, or eat it chilled for a different treat!
FAQs
1. Can I make this dessert ahead of time?
Yes! You can prepare the Cherry Cheesecake Dump Cake a day in advance. Simply assemble the dessert, cover it with plastic wrap, and store it in the fridge until you’re ready to bake. Bake it right before serving for the freshest taste.
2. Can I use a different flavor of pie filling?
Absolutely! While cherry is the classic option, you can experiment with other pie fillings such as blueberry, strawberry, or peach. Each fruit offers a unique flavor profile, making this dessert versatile for different tastes.
3. Can I make this recipe gluten-free?
Yes, you can use a gluten-free yellow cake mix to make the Cherry Cheesecake Dump Cake gluten-free. Just make sure all other ingredients are certified gluten-free to ensure it meets your dietary needs.
4. How do I store leftovers?
Store any leftover dump cake in an airtight container in the refrigerator for up to 3-4 days. You can enjoy it cold, or reheat individual portions in the microwave for 20-30 seconds to warm it up.
5. Can I freeze Cherry Cheesecake Dump Cake?
Yes, you can freeze the Cherry Cheesecake Dump Cake. Allow it to cool completely, then wrap it tightly in plastic wrap or foil and place it in an airtight container. It can be stored in the freezer for up to 2-3 months. Reheat in the oven when ready to serve.
Conclusion
Cherry Cheesecake Dump Cake is a delightful dessert that combines the creamy richness of cheesecake, the sweet burst of cherries, and a golden, crumbly cake topping. With minimal prep time and simple ingredients, this recipe is perfect for busy days or casual gatherings. The beauty of this dessert lies in its versatility—feel free to experiment with different fruit fillings and toppings to make it your own. Whether served warm with a scoop of ice cream or chilled for a refreshing treat, this dump cake is sure to satisfy any sweet tooth. Enjoy the delicious layers and easy prep that make this dessert a crowd-pleaser every time!
Related Recipes
- Strawberry Cheese Cake Dump Cake: A Sweet Shortcut to Dessert Bliss
- Strawberry Cheesecake Brownies: A Swirl of Sweet Magic in Every Bite
- Cheesecake Bars 9X13 | Cheesecake Bars for a Crowd
Hi there, I’m Preppy Hartwell, but you can call me Preppy—the apron-clad foodie behind Preppy Kitchen Tips! I created Preppy Kitchen Tips because I’m convinced food has a way of telling stories that words can’t. So, grab a fork and dig in. The past never tasted so good!