
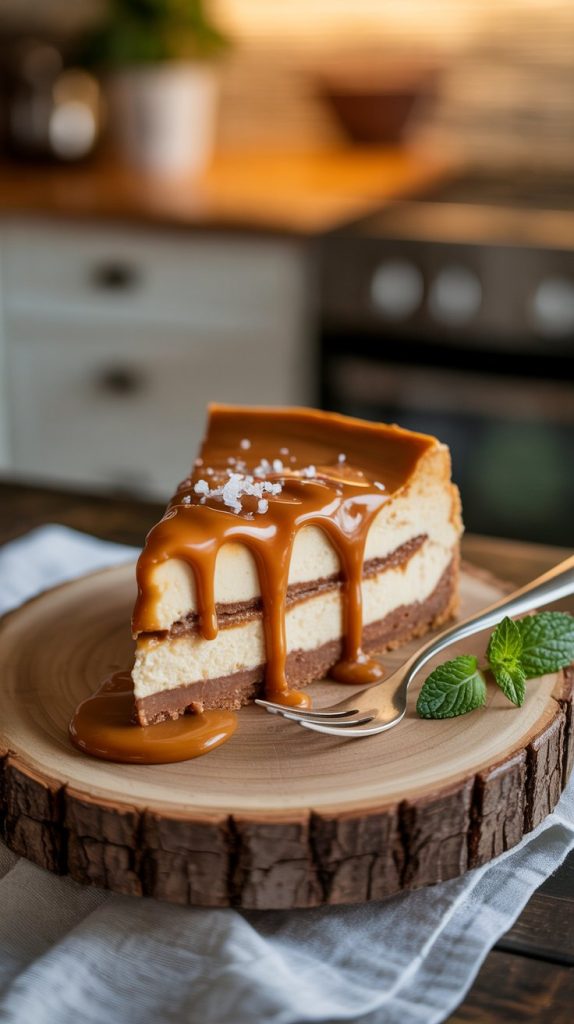
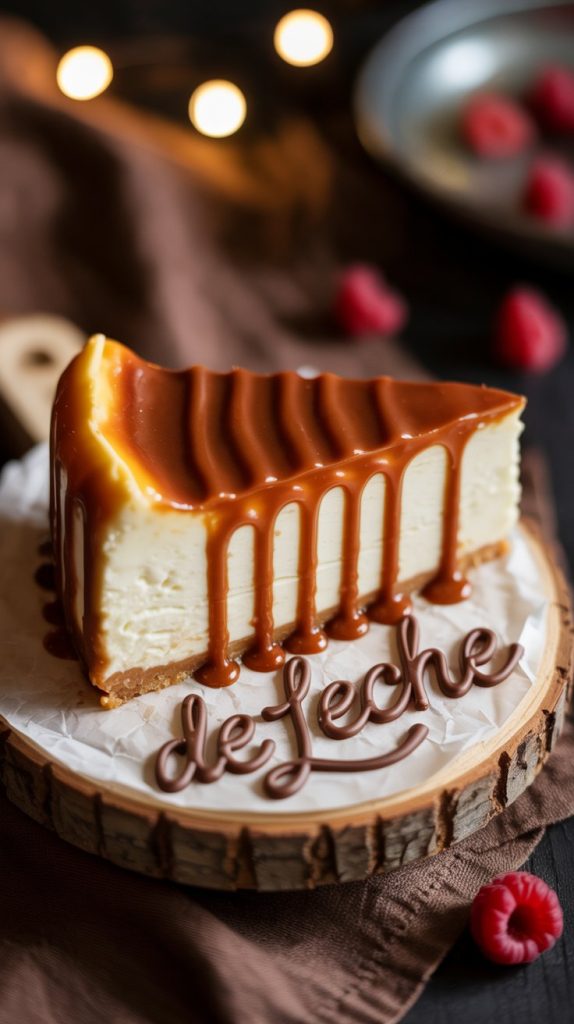
Golden caramel swirls meet rich cream cheese in a dessert that knows how to steal the spotlight. Dulce de Leche Cheesecake blends the silky texture of a classic cheesecake with the deep, toasty sweetness of slow-cooked milk caramel. Each bite delivers a perfect balance of tang and sweetness, finished with a glossy layer that gleams like satin.
This dessert doesn’t need frosting or fancy garnishes to impress. It brings warmth, elegance, and a decadent finish to any gathering or quiet night in. Guests won’t ask for seconds—they’ll ask for the recipe. Whether served plain, with a crumble crust, or crowned with whipped cream, this cheesecake never disappoints.
Make space in your dessert lineup for a treat that feels luxurious but bakes like a breeze. From birthdays to holidays, Dulce de Leche Cheesecake brings comfort, charm, and a touch of indulgence in every slice. Ready to dive into caramel bliss?
Ingredients of Dulce de Leche Cheesecake
Here are the ingredients for a classic Dulce de Leche Cheesecake with a buttery graham cracker crust and rich caramel topping:
Crust:
- 1 ½ cups graham cracker crumbs
- ¼ cup granulated sugar
- 6 tablespoons unsalted butter, melted
- ¼ teaspoon salt
Cheesecake Filling:
- 3 (8-ounce) blocks cream cheese, softened
- 1 cup dulce de leche (plus extra for topping)
- ¾ cup granulated sugar
- 3 large eggs
- 1 teaspoon vanilla extract
- ½ cup sour cream
- ¼ teaspoon salt
Topping:
- ½ cup dulce de leche (softened slightly for drizzling)
- Whipped cream (optional, for garnish)
- Sea salt flakes (optional, for garnish)
Here are the required kitchen tools to make a Dulce de Leche Cheesecake:
Essential Kitchen Tools:
- 9-inch springform pan
- Mixing bowls (medium and large)
- Electric hand mixer or stand mixer
- Rubber spatula or silicone scraper
- Measuring cups and spoons
- Food processor or zip-top bag with rolling pin (for crushing graham crackers)
- Baking sheet (for water bath)
- Aluminum foil (to wrap the pan)
- Whisk
- Saucepan or microwave-safe bowl (to warm dulce de leche)
- Cooling rack
- Sharp knife (for slicing)
These tools help ensure the crust stays crisp, the filling turns out creamy, and the cheesecake lifts from the pan without a hitch.
Step-by-Step Preparation
Step 1: Preheat the Oven and Prepare the Springform Pan
Set your oven to 325°F (163°C). Wrap the bottom and sides of a 9-inch springform pan with two layers of heavy-duty aluminum foil. This will protect the crust from water if using a water bath. Lightly grease the inside of the pan with butter or nonstick spray to prevent sticking.
Step 2: Make the Graham Cracker Crust
Crush graham crackers in a food processor until finely ground. Combine 1 ½ cups crumbs, ¼ cup sugar, and ¼ teaspoon salt in a bowl. Stir in 6 tablespoons melted butter until the crumbs are evenly moistened. The texture should feel like wet sand.
Step 3: Press the Crust Into the Pan
Pour the crumb mixture into the prepared springform pan. Use the bottom of a flat measuring cup or glass to firmly press the crust evenly across the bottom and slightly up the sides. Bake for 8–10 minutes, then let it cool while preparing the filling.
Step 4: Beat the Cream Cheese Until Smooth
Place 3 blocks of softened cream cheese into a large mixing bowl. Beat on medium speed using a hand or stand mixer until creamy and lump-free. Scrape down the bowl frequently to ensure a smooth texture throughout.
Step 5: Add Sugar and Dulce de Leche
Pour in ¾ cup granulated sugar and 1 cup dulce de leche. Continue beating until the mixture becomes silky and well blended. Make sure no pockets of cream cheese remain before moving to the next step.
Step 6: Incorporate Eggs One at a Time
Crack in the eggs one by one, beating on low speed after each addition. This method keeps too much air from entering the batter, which helps prevent cracking later. Mix in 1 teaspoon vanilla extract and ¼ teaspoon salt for flavor balance.
Step 7: Blend in Sour Cream
Fold in ½ cup sour cream using a rubber spatula or on the lowest mixer speed. The batter should look smooth, thick, and pourable. Avoid overmixing at this point, as that can affect the final texture.
Step 8: Pour Filling Over the Crust
Carefully pour the cheesecake batter over the baked crust. Use a spatula to smooth the top and release any air bubbles. Gently tap the pan on the counter to bring trapped air to the surface.
Step 9: Bake the Cheesecake in a Water Bath
Place the foil-wrapped springform pan inside a large roasting pan. Fill the outer pan with hot water halfway up the sides of the cheesecake pan. Transfer to the oven and bake for 60–70 minutes, or until the edges look set and the center jiggles slightly.
Step 10: Cool Gradually and Chill Overnight
Turn off the oven and crack the door open. Let the cheesecake cool inside for 1 hour to reduce the chance of cracks. Remove from the oven, discard the foil, and place on a cooling rack. Once cooled to room temperature, refrigerate uncovered for at least 6 hours or overnight.
Step 11: Add Dulce de Leche Topping and Serve
Warm ½ cup dulce de leche slightly until it’s pourable. Spread or drizzle it over the top of the chilled cheesecake. Optional garnishes include whipped cream, sea salt flakes, or a sprinkle of toasted nuts. Slice with a warm knife for clean cuts.
Storing Your Cheesecake
Proper storage keeps your Dulce de Leche Cheesecake fresh, flavorful, and safe to enjoy for days. Once fully chilled and topped, cover the cheesecake with plastic wrap or an airtight lid. Keep it in the refrigerator for up to 5 days. Place toothpicks in the cheesecake before wrapping to prevent the plastic from sticking to the surface.
For longer storage, cheesecake freezes beautifully. Slice the cheesecake or keep it whole, then wrap it tightly in two layers of plastic wrap followed by foil. Label it with the date and freeze for up to 2 months. When ready to serve, thaw it overnight in the refrigerator. Avoid microwaving to defrost—it can ruin the creamy texture.
To keep the topping fresh, store any extra dulce de leche separately and drizzle it on just before serving. This prevents it from hardening or absorbing fridge odors. Would you like tips on customizing the flavor or crust?
FAQs:
1. Can I use store-bought dulce de leche for this recipe?
Yes! Store-bought dulce de leche works perfectly in this recipe. You can find it in cans at most supermarkets. Just warm it slightly before drizzling it on the cheesecake for a smooth, glossy finish.
2. How can I prevent my cheesecake from cracking?
To prevent cracking, avoid overmixing the batter and bake the cheesecake in a water bath. The gentle, even heat will help maintain a smooth texture. Let the cheesecake cool gradually in the oven to avoid sudden temperature changes that could cause cracks.
3. Can I make this cheesecake ahead of time?
Absolutely! In fact, making the cheesecake a day or two in advance enhances its flavor. It needs at least 6 hours to chill, but letting it sit overnight gives the best results. Be sure to store it properly in the fridge.
4. How do I serve the cheesecake?
Serve the cheesecake chilled with the dulce de leche topping. For added decoration, garnish with whipped cream, toasted nuts, or a light sprinkle of sea salt for a sophisticated flavor boost.
5. Can I freeze the cheesecake?
Yes! This cheesecake freezes well for up to 2 months. Wrap it tightly in plastic wrap and foil before freezing. When you’re ready to serve it, thaw it in the fridge overnight for the best texture.
Conclusion:
The Dulce de Leche Cheesecake combines indulgence with simplicity, offering a rich, caramel-infused dessert that’s bound to impress. Whether served at a gathering or enjoyed as a special treat, this cheesecake strikes the perfect balance between creamy and sweet. With a buttery graham cracker crust, luscious filling, and a silky dulce de leche topping, every bite feels like a celebration. Don’t forget to store leftovers properly so you can savor it for days, and feel free to experiment with different crusts or toppings to make it your own! Enjoy the decadent goodness and share this irresistible dessert with loved ones.
Related Recipes
- Cookie Dough Cheesecake: The Dessert Dream You Didn’t Know You Needed
- Fluffy Cottage Cheese Egg Bites That Keep Breakfast Easy and Delicious
- Cranberry Cheesecake Recipe: A Sweet and Tangy Holiday Favorite
Hi there, I’m Preppy Hartwell, but you can call me Preppy—the apron-clad foodie behind Preppy Kitchen Tips! I created Preppy Kitchen Tips because I’m convinced food has a way of telling stories that words can’t. So, grab a fork and dig in. The past never tasted so good!