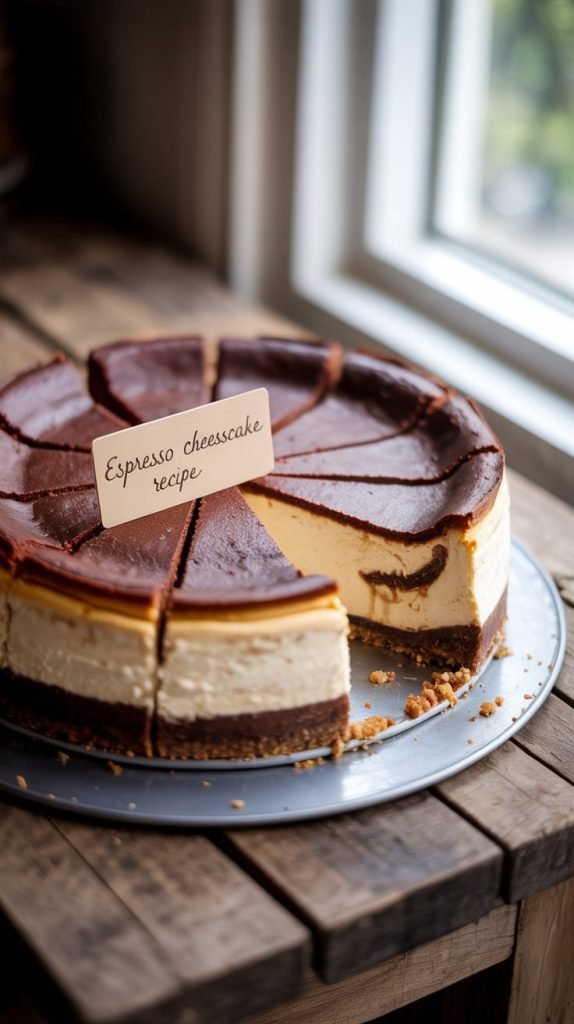
Espresso and cheesecake make a dreamy pairing, bringing together the richness of creamy cheese and the bold intensity of coffee. This espresso cheesecake recipe combines smooth, velvety cheesecake with the deep, aromatic flavor of espresso, creating a dessert that captivates with every bite. A buttery, crumbly crust sets the stage, while the espresso-infused filling brings a coffee lover’s dream to life. Perfect for after-dinner indulgence or any special occasion, this dessert blends sweetness and bitterness beautifully. Each slice offers a harmonious balance that delights the palate, with a flavor profile that’s both luxurious and comforting. If you crave an elevated treat that’s sure to impress, this espresso cheesecake is your answer. Easy to make and stunning to serve, this recipe promises to be a favorite for years to come.
Ingredients Of Espresso Cheesecake Recipe
For the crust:
- 1 ½ cups graham cracker crumbs
- ¼ cup granulated sugar
- ½ cup unsalted butter, melted
- 1 tablespoon instant coffee granules (optional for an extra coffee kick)
For the espresso cheesecake filling:
- 3 (8-ounce) packages cream cheese, softened
- 1 cup granulated sugar
- 1 teaspoon vanilla extract
- 3 large eggs
- 1 cup sour cream
- 2 tablespoons instant espresso powder
- ¼ cup hot water
- 1 tablespoon all-purpose flour
For the topping (optional):
- Whipped cream
- Chocolate shavings or cocoa powder for garnish
Kitchen Tools Needed
- 9-inch springform pan
- Mixing bowls (for the crust and filling)
- Electric mixer or stand mixer
- Measuring cups and spoons
- Whisk or spoon (for dissolving espresso powder)
- Rubber spatula (for scraping down the sides of the bowl)
- A small bowl (for dissolving espresso powder in hot water)
- Baking sheet (for placing the cheesecake in the oven)
- Aluminum foil (for wrapping the springform pan to prevent leaks)
- Cooling rack (for letting the cheesecake cool properly)
- Knife or cake server (for slicing and serving the cheesecake)
Step-by-Step Guide
Step 1: Prepare the Espresso Mixture
Start by dissolving the instant espresso powder in ¼ cup of hot water. Stir well to ensure that the espresso granules fully dissolve. Set this mixture aside to cool.
Step 2: Make the Crust
In a mixing bowl, combine the graham cracker crumbs, sugar, and melted butter. Add the dissolved espresso mixture to the crust for an added coffee flavor (optional). Stir until everything is well coated and the mixture resembles wet sand.
Step 3: Press the Crust into the Pan
Grease a 9-inch springform pan with butter or non-stick spray. Press the graham cracker mixture into the bottom of the pan evenly, using the back of a spoon or your fingers to firm it up. Set the crust aside while you prepare the filling.
Step 4: Preheat the Oven
Preheat your oven to 325°F (163°C). This ensures the cheesecake cooks evenly at the right temperature.
Step 5: Beat the Cream Cheese
In a large mixing bowl, beat the softened cream cheese using an electric mixer or stand mixer. Start on low speed and gradually increase to medium speed until the cream cheese becomes smooth and creamy, with no lumps.
Step 6: Add Sugar and Vanilla
Add the sugar and vanilla extract to the cream cheese mixture. Beat again until smooth and well-combined, scraping down the sides of the bowl as needed.
Step 7: Add Eggs One at a Time
Add eggs, one at a time, to the cream cheese mixture, beating well after each addition. Be sure not to overmix. You want the eggs fully incorporated but not overbeaten.
Step 8: Incorporate the Sour Cream
Add the sour cream to the mixture and beat until smooth. This will give the cheesecake its creamy texture and tangy flavor.
Step 9: Mix in the Espresso
Pour the cooled espresso mixture into the cream cheese filling and mix it until fully combined. Add the flour and stir until the mixture is smooth and free of lumps.
Step 10: Pour the Filling into the Pan
Carefully pour the espresso cheesecake filling over the prepared crust in the springform pan. Smooth the top with a spatula to make it even.
Step 11: Bake the Cheesecake
Place the cheesecake in the preheated oven and bake for 50-60 minutes, or until the center is just set and slightly jiggles when you gently shake the pan. A toothpick or cake tester inserted into the center should come out mostly clean.
Step 12: Cool the Cheesecake
Turn off the oven and leave the cheesecake in the oven for an additional hour with the door slightly ajar. This helps prevent cracking. After that, remove the cheesecake from the oven and let it cool to room temperature on a cooling rack.
Step 13: Chill in the Refrigerator
Once cooled, cover the cheesecake with plastic wrap and refrigerate for at least 4 hours, or preferably overnight. This allows the flavors to set and the texture to firm up.
Step 14: Serve and Garnish
Before serving, remove the cheesecake from the springform pan. Garnish with whipped cream, chocolate shavings, or a dusting of cocoa powder for an extra touch of indulgence. Slice and enjoy!
These steps will guide you to a perfectly creamy and flavorful espresso cheesecake, ready to impress everyone at your next gathering.
Storage Instructions for Espresso Cheesecake
Store your espresso cheesecake properly to keep it fresh and delicious for days.
- Refrigerator:
Place the cooled cheesecake in an airtight container or cover it tightly with plastic wrap. Store it in the refrigerator for up to 5 days. Always keep it chilled when not serving to maintain its texture and flavor. - Freezer:
For longer storage, freeze individual slices or the whole cheesecake. Wrap each slice in plastic wrap and then in aluminum foil, or place the entire cheesecake in a freezer-safe container. It will stay fresh in the freezer for up to 2 months. - To Serve After Freezing:
Thaw frozen cheesecake in the refrigerator overnight. Avoid thawing at room temperature to prevent texture changes or condensation.
Avoid storing with toppings like whipped cream or chocolate shavings. Add those just before serving to keep the presentation fresh and appealing.
FAQs About Espresso Cheesecake
1. Can I use brewed espresso instead of instant espresso powder?
Yes, but make sure it’s very strong and cooled completely. Instant espresso powder provides a more concentrated flavor without adding extra liquid to the batter.
2. Why did my cheesecake crack on top?
Cracks usually happen from overmixing or rapid temperature changes. Avoid overbeating the batter and let the cheesecake cool slowly in the oven with the door slightly open.
3. Can I use a different crust instead of graham crackers?
Absolutely. Chocolate cookie crumbs, Oreo crust, or even a nut-based crust all work well with espresso cheesecake and can enhance the coffee-chocolate flavor combination.
4. Is it okay to skip the flour in the filling?
Flour helps stabilize the cheesecake and reduces cracking. If you prefer a flourless version, substitute with 1 tablespoon of cornstarch or simply leave it out for a softer texture.
5. How do I know when the cheesecake is fully baked?
The edges should look firm, but the center should still jiggle slightly when you gently shake the pan. It will continue setting as it cools.
Conclusion
Espresso cheesecake delivers a rich, velvety experience that brings the bold flavor of coffee into a luscious dessert. Each bite combines creamy texture with just the right amount of espresso depth. The steps are simple, the ingredients are accessible, and the end result feels gourmet. Whether you serve it after dinner or bring it to a gathering, this cheesecake will always leave a lasting impression. With the right prep, careful baking, and proper storage, your espresso cheesecake will turn out perfectly every time. It’s not just dessert—it’s a slice of comfort and elegance in every forkful.
Related Recipes
- Dulce de Leche Cheesecake Recipe: A Cheesecake Worth Every Spoonful
- Cookie Dough Cheesecake: The Dessert Dream You Didn’t Know You Needed
- Fluffy Cottage Cheese Egg Bites That Keep Breakfast Easy and Delicious
Hi there, I’m Preppy Hartwell, but you can call me Preppy—the apron-clad foodie behind Preppy Kitchen Tips! I created Preppy Kitchen Tips because I’m convinced food has a way of telling stories that words can’t. So, grab a fork and dig in. The past never tasted so good!