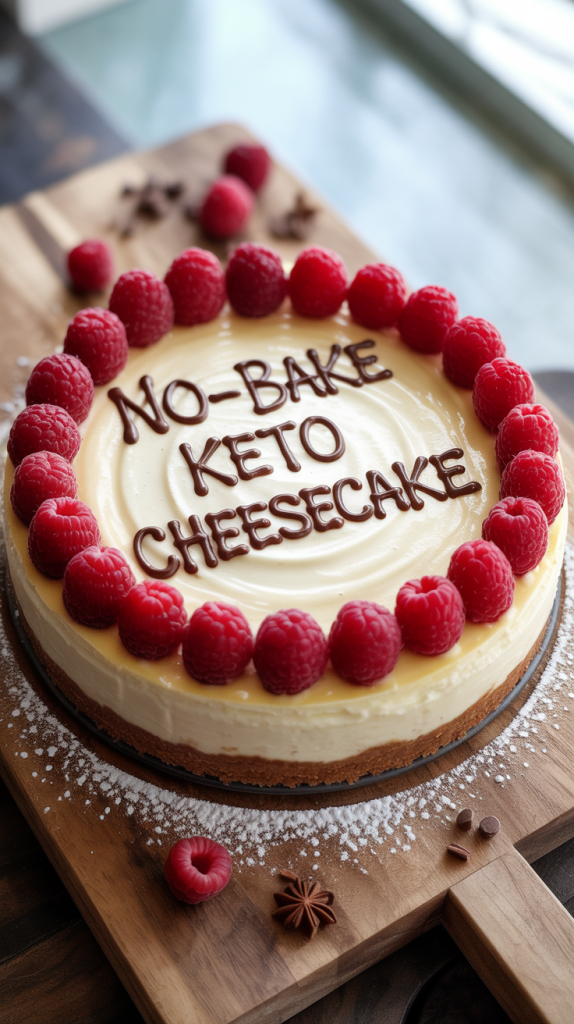
Cravings don’t care about your diet plan, but this no-bake keto cheesecake does. It delivers all the rich, creamy satisfaction of a classic cheesecake without the sugar overload or the need to turn on your oven. Every bite feels indulgent, yet the ingredients support low-carb goals and keto lifestyles effortlessly.
A crisp almond flour crust holds a silky cream cheese filling that sets perfectly in the fridge. No baking, no stress—just pure, chilled delight. You’ll only need a few simple steps and a handful of pantry-friendly ingredients to pull it together in under 30 minutes.
Whether you’re hosting guests or treating yourself on a quiet evening, this keto dessert won’t disappoint. It looks impressive, tastes luxurious, and fits your macros. You can slice it up with confidence and serve it to anyone—keto or not—and they’ll be asking for seconds. This is cheesecake done smart, not sacrificed.
Ingredients No-Bake Keto Cheesecake
For the Almond Flour Crust:
- 1 ½ cups almond flour
- ¼ cup melted butter (unsalted)
- 2 tablespoons powdered erythritol (or your favorite keto sweetener)
- ½ teaspoon cinnamon (optional)
- Pinch of salt
For the Creamy Cheesecake Filling:
- 16 oz (2 blocks) cream cheese, softened
- ½ cup powdered erythritol (adjust to taste)
- 1 teaspoon vanilla extract
- 1 tablespoon lemon juice (for a fresh tang)
- 1 cup heavy whipping cream, cold
Optional Toppings (All Keto-Friendly):
- Fresh berries (raspberries, blueberries, or sliced strawberries in moderation)
- Shaved dark chocolate (90% cocoa or higher)
- Keto whipped cream
- Chopped pecans or walnuts
Kitchen Tools
- Mixing Bowls (2 or more): One for the crust, one for the filling.
- Electric Hand Mixer or Stand Mixer: To whip the cream and blend the filling until smooth and fluffy.
- Rubber Spatula: For scraping down the sides and evenly spreading the filling.
- 9-Inch Springform Pan: Makes it easy to release the cheesecake once it’s set.
- Measuring Cups & Spoons: Accuracy is key for low-carb baking.
- Small Saucepan (optional): If melting butter on the stove instead of microwave.
- Parchment Paper (optional): To line the bottom of the pan for cleaner release.
Step By Step Instruction
Step 1: Prepare the Springform Pan
Lightly grease the bottom and sides of a 9-inch springform pan. For easy removal, line the bottom with parchment paper. Set it aside while you make the crust.
Step 2: Mix the Almond Flour Crust
In a medium bowl, combine almond flour, melted butter, powdered erythritol, cinnamon (if using), and a pinch of salt. Stir until the mixture resembles wet sand and holds together when pressed.
Step 3: Press the Crust into the Pan
Pour the crust mixture into the prepared pan. Use your hands or the bottom of a glass to firmly press it down evenly across the base. Place the pan in the fridge to chill while you make the filling.
Step 4: Soften the Cream Cheese
Place the softened cream cheese in a large mixing bowl. Beat it with an electric mixer until it becomes smooth, creamy, and lump-free. This step creates a silky texture in your cheesecake.
Step 5: Add Sweetener, Vanilla, and Lemon Juice
Add powdered erythritol, vanilla extract, and lemon juice to the cream cheese. Continue mixing until fully combined and smooth. Taste and adjust sweetness if needed.
Step 6: Whip the Heavy Cream
In a separate bowl, pour in the cold heavy whipping cream. Whip it with a mixer on high speed until stiff peaks form. This will help your cheesecake hold its shape without baking.
Step 7: Fold Whipped Cream into the Filling
Using a rubber spatula, gently fold the whipped cream into the cream cheese mixture. Do this slowly to keep the filling light and airy. Avoid overmixing.
Step 8: Spread the Filling Over the Crust
Take the chilled crust out of the fridge. Spoon the cheesecake filling onto the crust and spread it evenly using a spatula or offset knife. Smooth the top flat.
Step 9: Chill Until Set
Place the cheesecake in the refrigerator and chill for at least 4 hours, or preferably overnight, until fully set. The longer it chills, the firmer and easier it is to slice.
Step 10: Garnish and Serve
Remove the cheesecake from the springform pan carefully. Add keto-friendly toppings like berries, whipped cream, or dark chocolate shavings. Slice with a hot knife for clean edges and serve chilled.
Serving Tips
Slice with Precision
Use a sharp knife dipped in hot water and wiped clean between each slice. This helps achieve smooth, bakery-style cuts without dragging the filling.
Serve Chilled, Not Frozen
Make sure the cheesecake is cold and fully set, but not frozen. Chilling overnight is ideal. Let it sit out for about 5 minutes before slicing for the perfect creamy texture.
Add Fresh, Keto-Friendly Toppings
Top each slice with a few fresh raspberries, blackberries, or strawberries (in moderation). A dollop of homemade keto whipped cream or a drizzle of sugar-free chocolate syrup adds extra flair.
Perfect for Individual Portions
For parties or meal prep, consider making the cheesecake in mini jars or silicone cupcake molds. It’s great for grab-and-go keto treats!
Pair It Right
Serve with a cup of keto coffee, unsweetened almond milk, or a hot herbal tea for a comforting dessert combo.
FAQs
1. Can I freeze no-bake keto cheesecake?
Yes, you can freeze it. Wrap it tightly in plastic wrap and foil or store slices in airtight containers. Thaw overnight in the fridge before serving. The texture remains creamy and delicious.
2. What sweetener works best for keto cheesecake?
Powdered erythritol blends in smoothly and keeps the texture light. You can also use powdered monk fruit or allulose, but avoid granulated versions as they may feel gritty.
3. How long does no-bake keto cheesecake last in the fridge?
It stays fresh in the refrigerator for up to 5 days when stored in an airtight container. Always keep it chilled to maintain its structure and flavor.
4. Can I use coconut flour instead of almond flour for the crust?
Coconut flour is much more absorbent, so it won’t work as a 1:1 substitute. If using coconut flour, reduce the amount and increase the butter to get the right texture.
5. Is this cheesecake safe for diabetics?
Yes, this recipe is low in carbs and sugar-free, making it suitable for most people following a diabetic-friendly diet. Always check your specific dietary needs or consult your healthcare provider.
Conclusion
No-bake keto cheesecake proves that dessert doesn’t need sugar or an oven to impress. It’s creamy, rich, and incredibly satisfying without throwing off your macros. With a nutty crust, fluffy filling, and endless topping options, this is a guilt-free treat you’ll come back to again and again. Whether you’re living keto full-time or just trying to cut carbs, this cheesecake is a dessert win every time. Grab your fork and dig in—you earned it!
Related Recipes
- Is Cheesecake Gluten Free? Everything You Need to Know
- Neapolitan Cheesecake: A Triple-Layered Dream You’ll Crave Again
- Jello No Bake Cheesecake: The Creamy Shortcut Dessert Everyone Craves
Hi there, I’m Preppy Hartwell, but you can call me Preppy—the apron-clad foodie behind Preppy Kitchen Tips! I created Preppy Kitchen Tips because I’m convinced food has a way of telling stories that words can’t. So, grab a fork and dig in. The past never tasted so good!