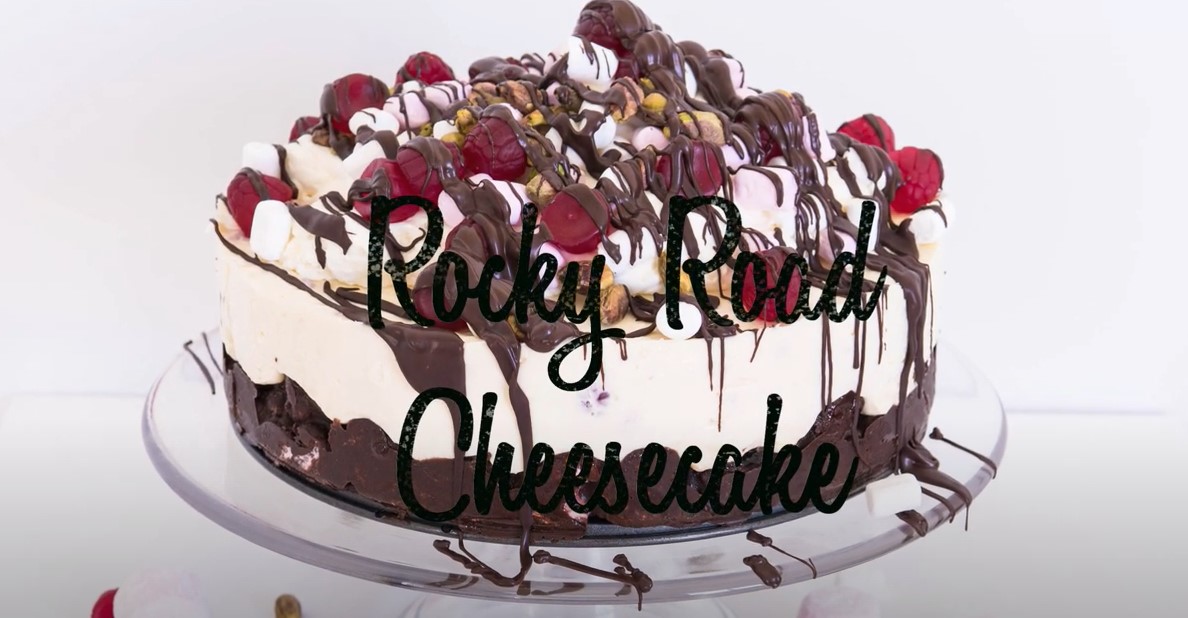
No-Bake Rocky Road Cheesecake: The No-Bake Cheesecake That Breaks All the Rules
Chocolate, marshmallows, and crunchy nuts crash into creamy cheesecake to create a dessert that tastes like pure rebellion. No oven, no stress—just a luscious, decadent slice that delivers bold flavor in every bite. This No-Bake Rocky Road Cheesecake turns a classic treat into something even more unforgettable. The rich chocolate base blends smoothly with the tang of cream cheese, while fluffy marshmallows and roasted nuts sneak in the perfect surprise textures. It’s the kind of dessert that steals the show at parties, yet feels right at home during midnight cravings. Every layer offers contrast—sweet and salty, smooth and crunchy, rich and light. You won’t miss baking for a second. In fact, once this hits the fridge, anticipation starts rising fast. Serve it chilled with a drizzle of chocolate syrup or keep it rustic and let the rocky road speak for itself. Either way, it disappears fast.
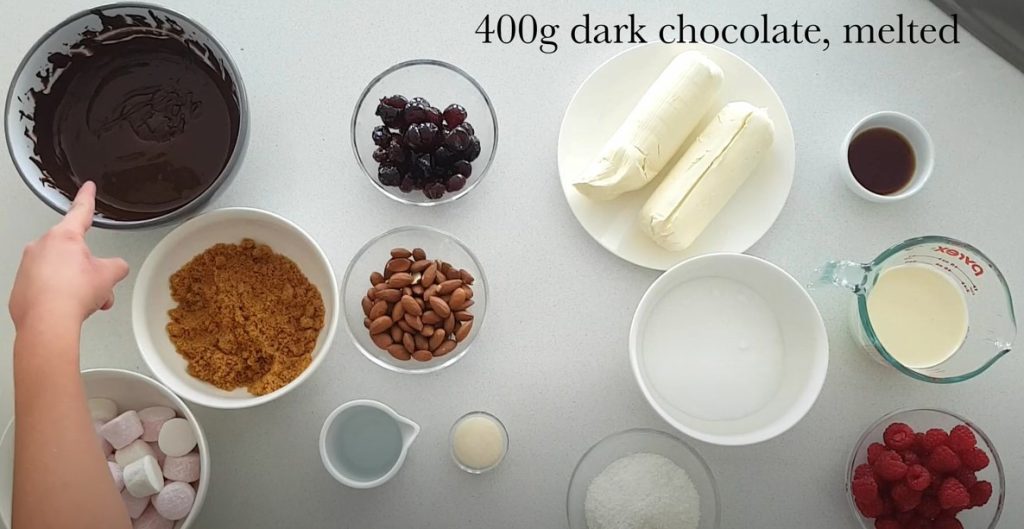
Ingredients Of No-Bake Rocky Road Cheesecake
For the Crust:
- 2 cups crushed chocolate graham crackers or Oreo crumbs (no filling)
- ½ cup unsalted butter, melted
- 2 tablespoons granulated sugar
For the Cheesecake Filling:
- 16 oz (450g) cream cheese, softened
- 1 cup powdered sugar
- 1½ cups heavy whipping cream (chilled)
- 1 teaspoon vanilla extract
- 1 cup semi-sweet chocolate chips, melted and slightly cooled
Rocky Road Mix-Ins:
- 1½ cups mini marshmallows
- ¾ cup chopped toasted almonds or peanuts
- ½ cup extra chocolate chips or chunks (optional for texture)
For the Topping (Optional but Amazing):
- Whipped cream or chocolate ganache
- Extra marshmallows, nuts, and chocolate shavings for garnish
Equipment Needed
- 9-inch springform pan (or deep pie dish)
- Mixing bowls (at least two, medium and large)
- Electric hand mixer or stand mixer
- Silicone spatula or wooden spoon
- Measuring cups and spoons
- Small saucepan (to melt chocolate or butter, if needed)
- Food processor or rolling pin and zip-top bag (to crush cookies)
- Offset spatula or knife (to smooth the top)
- Refrigerator space (to chill the cheesecake)
Step by Step Instructions
Step 1: Prepare the Springform Pan
Start by lining the bottom of a 9-inch springform pan with parchment paper. This will help you remove the cheesecake easily once it’s set. Lightly grease the sides with a bit of butter or oil to prevent sticking.
Step 2: Make the Chocolate Crust
In a medium bowl, combine 2 cups of chocolate graham cracker crumbs (or Oreo crumbs without the filling) with 2 tablespoons of sugar. Add ½ cup of melted unsalted butter and stir until the mixture resembles wet sand. Press the mixture firmly into the bottom of the pan using the back of a spoon or the bottom of a glass. Chill in the fridge for at least 15 minutes to set.
Step 3: Melt the Chocolate
In a small saucepan or microwave-safe bowl, melt 1 cup of semi-sweet chocolate chips. Stir every 20 seconds if using a microwave to avoid burning. Once melted, set it aside to cool slightly while you prepare the cheesecake base.
Step 4: Whip the Cream
In a separate large bowl, whip 1½ cups of chilled heavy cream using an electric mixer on high speed until stiff peaks form. Be patient—this takes a few minutes. Set the whipped cream aside (but don’t refrigerate it yet).
Step 5: Make the Cream Cheese Base
In another large mixing bowl, beat 16 oz of softened cream cheese until smooth and fluffy. Add 1 cup of powdered sugar and 1 teaspoon of vanilla extract. Beat the mixture again until fully combined and silky.
Step 6: Blend in the Chocolate
Slowly pour the cooled melted chocolate into the cream cheese mixture. Mix on low speed until everything blends evenly. Scrape down the sides of the bowl to make sure no streaks remain.
Step 7: Fold in the Whipped Cream
Using a spatula, gently fold the whipped cream into the chocolate cream cheese mixture. Take your time—folding gently keeps the mixture airy and light. Stop once it’s fully combined with no streaks.
Step 8: Add the Rocky Road Goodies
Now it’s time for the fun part. Fold in 1½ cups of mini marshmallows, ¾ cup of chopped toasted almonds (or peanuts), and ½ cup of extra chocolate chips or chunks if you love texture. Stir until everything is evenly distributed throughout the batter.
Step 9: Assemble and Chill
Pour the cheesecake filling over the chilled crust and smooth the top with an offset spatula or the back of a spoon. Tap the pan lightly on the counter to release any air bubbles. Cover the pan loosely with plastic wrap and refrigerate for at least 6 hours, or overnight for best results.
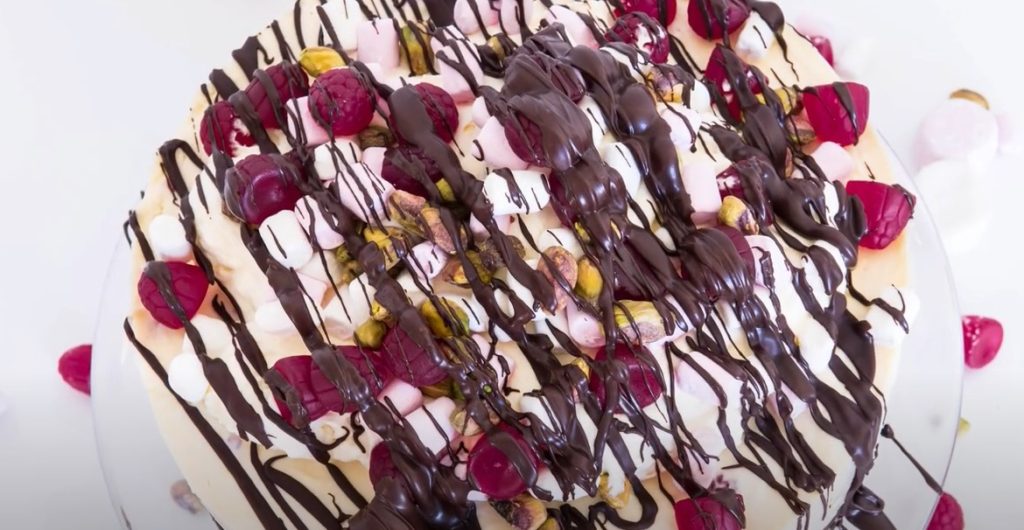
Step 10: Decorate and Serve
Once fully set, run a knife around the edge of the pan before unlocking the springform ring. Top with whipped cream, extra marshmallows, toasted nuts, and chocolate shavings for a stunning finish. Slice with a hot, clean knife and serve chilled for the ultimate rocky road experience.
Serving Tips
Use a Hot Knife for Clean Slices
Dip a sharp knife into hot water, then wipe it dry before each cut. This helps you slice through the chilled cheesecake smoothly without dragging the filling or crust.
Chill Before Serving
Ensure the cheesecake is fully set—at least 6 hours or overnight in the fridge. Serve straight from the refrigerator for the best texture and structure.
Add Toppings Just Before Serving
Garnish with whipped cream, extra marshmallows, chocolate chunks, or toasted nuts right before presenting the cake. This keeps the toppings fresh and visually appealing.
Serve Small Slices
This cheesecake is rich and indulgent. A small slice goes a long way—perfect for satisfying a sweet tooth without going overboard.
Pair It Right
Serve with a cup of coffee, a glass of cold milk, or even a bold red wine like port for a decadent pairing experience.
Absolutely! Here are the best Storage Tips to keep your No-Bake Rocky Road Cheesecake fresh, flavorful, and ready to impress:
Storage Tips
Refrigerate Properly
Store the cheesecake in the refrigerator, tightly covered with plastic wrap or in an airtight cake container. It stays fresh for up to 5 days. Make sure it’s always chilled to maintain the perfect texture.
Avoid Storing with Toppings
For best results, store the cheesecake without whipped cream or garnishes. Add fresh toppings just before serving to keep them crisp and prevent sogginess.
Use Parchment Paper Between Slices (Optional)
If storing individual slices, place a piece of parchment paper between each one. This makes them easy to separate and keeps them from sticking together.
Freeze for Long-Term Storage
Wrap the cheesecake (whole or sliced) tightly in plastic wrap, then in foil. Freeze for up to 1 month. Thaw in the fridge overnight before serving—texture and flavor will still be delightful.
Avoid the Countertop
Because it contains dairy, never leave it out for more than 2 hours at room temperature.
FAQs
1. Can I use a different type of nut in this cheesecake?
Yes! You can substitute almonds with peanuts, pecans, walnuts, or even hazelnuts. Just make sure they’re toasted for the best flavor and crunch.
2. Can I make this cheesecake ahead of time?
Absolutely. Prepare it the day before and refrigerate overnight. It actually tastes better once fully chilled and set for several hours.
3. What’s the best substitute for cream cheese?
You can use mascarpone for a lighter flavor or a dairy-free cream cheese if you need a vegan version. The texture may change slightly, but it still works well.
4. My cheesecake didn’t set properly—what went wrong?
The most common reason is under-whipping the cream or adding warm chocolate too quickly. Always let melted chocolate cool slightly and ensure stiff peaks form in the cream before folding.
5. Can I make this in individual servings?
Yes! Use small jars, cups, or silicone molds. Press a small amount of crust in each and fill with the cheesecake mixture. Chill as directed, then decorate before serving.
Conclusion
This No-Bake Rocky Road Cheesecake is more than a dessert—it’s a showstopper. With its rich, chocolatey base, fluffy filling, and irresistible mix-ins, it brings comfort and excitement in every bite. No oven, no fuss—just layer, chill, and enjoy. Perfect for birthdays, holidays, or indulgent weekends, this recipe proves that delicious desserts don’t need to be complicated. Once you try it, you’ll never look at rocky road the same way again.
Related Recipes