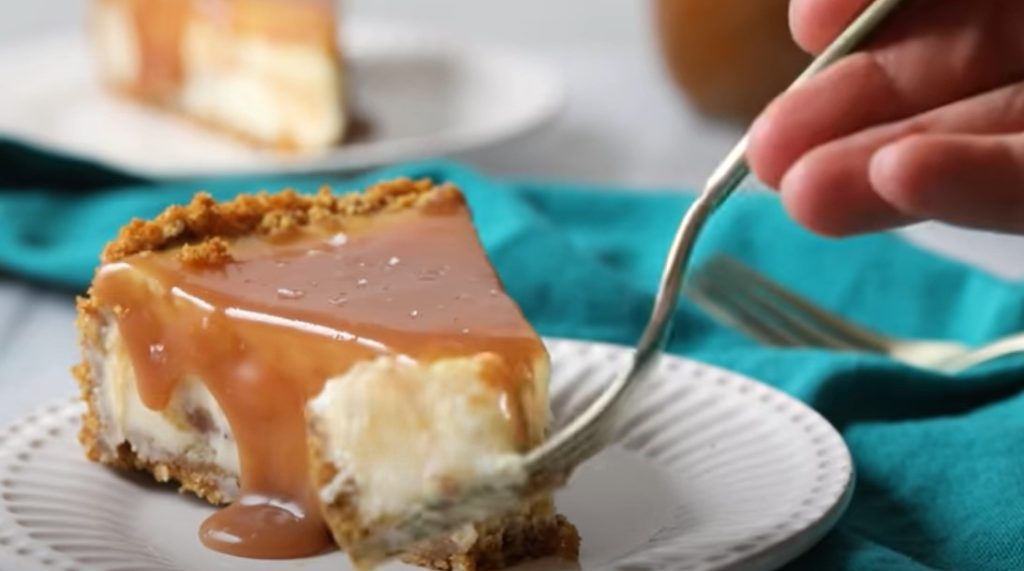
Sweet meets salty in the most decadent way with this unforgettable recipe for salted caramel cheesecake. Each bite delivers a rich, creamy texture paired with buttery caramel and a hint of sea salt that teases your taste buds just enough to keep you going back for more. A crisp graham cracker crust anchors the silky filling, while the glossy caramel topping steals the show. This dessert doesn’t just impress—it captivates. Whether you’re planning a dinner party or just want something indulgent for a cozy night in, this cheesecake brings gourmet flavor straight to your kitchen. The balance of sweet and salty feels perfectly indulgent without being overpowering. Fresh whipped cream, a drizzle of caramel, and a pinch of flaked sea salt turn it into a bakery-worthy centerpiece. One slice simply won’t be enough. Get ready to turn a few heads—and satisfy every craving—with this unforgettable treat.
Ingredients for Recipe For Salted Caramel Cheesecake
For the Crust:
- 1 ½ cups graham cracker crumbs
- ¼ cup granulated sugar
- ½ cup unsalted butter, melted
For the Cheesecake Filling:
- 3 (8 oz) blocks cream cheese, softened
- 1 cup granulated sugar
- 1 cup sour cream, room temperature
- 3 large eggs, room temperature
- 1 teaspoon pure vanilla extract
- ¼ teaspoon salt
For the Salted Caramel Sauce:
- 1 cup granulated sugar
- 6 tablespoons unsalted butter, cut into pieces
- ½ cup heavy cream
- 1 teaspoon sea salt (or to taste)
Optional Toppings:
- Whipped cream
- Extra caramel drizzle
- Flaky sea salt (for garnish)
- Chopped pecans or toffee bits (for added crunch)
Equipment Needed
- 9-inch springform pan – Essential for easy release and clean presentation.
- Mixing bowls (medium and large) – For preparing crust, filling, and caramel sauce separately.
- Hand mixer or stand mixer – Helps achieve a smooth, lump-free cheesecake batter.
- Rubber spatula – Ideal for scraping down the sides of bowls and smoothing the top of the cheesecake.
- Measuring cups and spoons – For accurate ingredient measurements.
- Saucepan – Needed to make the homemade salted caramel sauce.
- Whisk – Useful when combining caramel ingredients and blending smooth mixtures.
- Aluminum foil – To wrap the springform pan for a leak-proof water bath.
- Roasting pan or large baking dish – Used to create the water bath for even baking.
- Cooling rack – Allows the cheesecake to cool evenly before chilling.
- Sharp knife – For slicing clean portions when serving.
Step-by-Step Guide
Step 1: Prepare the Graham Cracker Crust
Crush graham crackers into fine crumbs using a food processor or a sealed zip bag and rolling pin. Pour the crumbs into a bowl and mix with granulated sugar. Stir in the melted butter until the mixture looks like wet sand. Press it firmly into the bottom of a 9-inch springform pan, making an even layer. Use the bottom of a flat glass or measuring cup to pack it tightly. Chill in the fridge while you make the filling, or pre-bake at 325°F (163°C) for 10 minutes for a firmer base.
Step 2: Make the Cheesecake Filling
Beat the softened cream cheese in a large mixing bowl until smooth and creamy. Add granulated sugar and mix until fully blended. Scrape the bowl often to avoid lumps. Add sour cream, vanilla extract, and salt, mixing on low speed until combined. Finally, add the eggs one at a time, beating on low and just until incorporated. Overmixing can cause cracks, so mix gently and stop once the batter looks silky and even.
Step 3: Assemble and Prepare the Pan
Pour the cheesecake filling over the chilled crust and smooth the top with a spatula. Tap the pan gently on the counter to release any air bubbles. Wrap the outside of the springform pan tightly with two layers of aluminum foil to prevent leaks. Place the pan into a large roasting pan or deep baking dish.
Step 4: Bake in a Water Bath
Boil water and carefully pour it into the roasting pan until it reaches halfway up the sides of the springform pan. Place everything into a preheated oven at 325°F (163°C). Bake for 55–70 minutes, or until the center looks set but slightly jiggly when shaken. Avoid opening the oven door during baking. Once done, turn off the oven, crack the door slightly, and let the cheesecake sit inside for 1 hour to cool gradually.
Step 5: Cool and Chill the Cheesecake
Remove the cheesecake from the water bath and foil. Place it on a cooling rack and let it cool completely at room temperature. Once cooled, cover with plastic wrap and refrigerate for at least 6 hours, or overnight. This step allows the flavors to develop and the texture to firm up.
Step 6: Make the Salted Caramel Sauce
In a saucepan over medium heat, melt the granulated sugar, stirring constantly until it becomes a smooth amber liquid. Carefully add butter and stir until melted. Slowly pour in heavy cream while stirring—it will bubble up rapidly. Let the mixture boil for 1 minute, then remove from heat. Stir in sea salt. Let the caramel cool slightly before using. It will thicken as it cools.
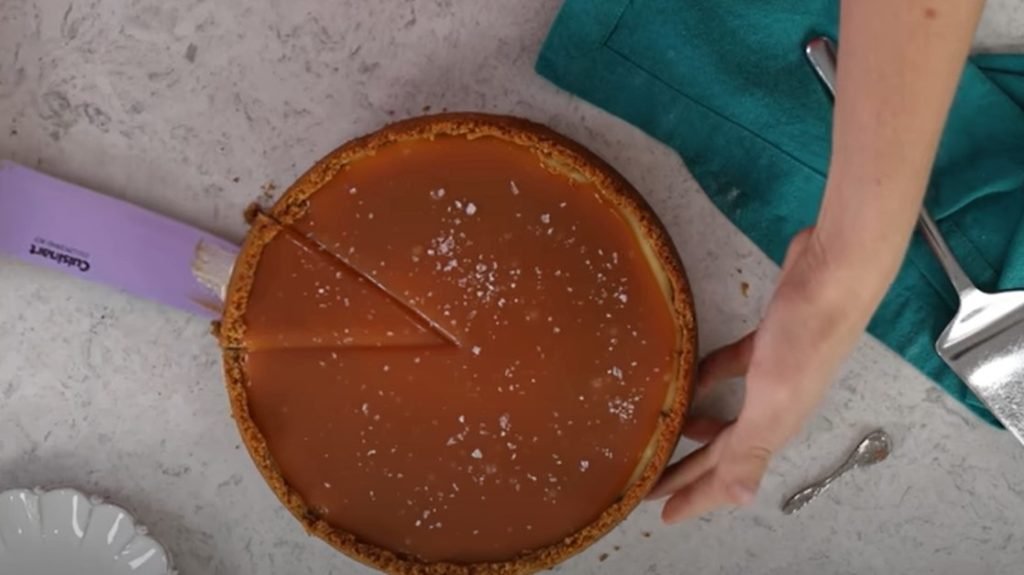
Step 7: Decorate and Serve
Remove the chilled cheesecake from the springform pan and place it on a serving plate. Pour the cooled salted caramel sauce over the top, allowing some to drip down the sides. Garnish with flaky sea salt, whipped cream, or chopped nuts if desired. Use a sharp knife wiped clean between slices for neat servings. Enjoy the rich, creamy layers with every indulgent bite.
Assembly Instructions
Bringing your salted caramel cheesecake together is all about layering with care and finishing with flair. Follow these simple steps to assemble it like a pro:
1. Add the Filling to the Crust
Once the graham cracker crust is chilled or pre-baked and fully cooled, pour the smooth cheesecake filling into the springform pan. Use a spatula to spread the batter evenly, smoothing out the top for a clean, level surface.
2. Eliminate Air Bubbles
Gently tap the filled pan on the countertop a few times to help air bubbles rise to the surface. This step helps prevent cracks during baking.
3. Prepare the Water Bath
Wrap the bottom and sides of the springform pan tightly with two layers of heavy-duty aluminum foil. Place the pan into a large roasting pan, and pour hot water around it until it reaches halfway up the sides. This water bath ensures gentle, even baking.
4. Bake and Cool Gradually
Bake the cheesecake at 325°F (163°C) until the edges are set but the center still jiggles slightly. After baking, let the cheesecake cool in the oven with the door cracked open for 1 hour to avoid sudden temperature changes that cause cracking.
5. Refrigerate Until Firm
Remove the cheesecake from the water bath, discard the foil, and cool completely on a rack. Cover the cheesecake and chill it in the refrigerator for at least 6 hours, preferably overnight.
6. Add the Salted Caramel Topping
Once the cheesecake is fully chilled and set, pour the homemade salted caramel sauce over the top. Let it gently spread and drip slightly over the edges for that classic caramel-drizzled look.
7. Final Touches Before Serving
For extra texture and taste, sprinkle a pinch of flaky sea salt on top. You can also add whipped cream swirls or a few chopped pecans for visual appeal. Slice with a warm, clean knife and serve chilled for the best flavor and texture.
Serving Suggestions
Salted caramel cheesecake is rich, creamy, and indulgent—perfect for special occasions or cozy evenings at home. Elevate the experience with these delicious serving ideas:
1. Add a Whipped Cream Crown
Top each slice with a generous swirl of freshly whipped cream. The light, airy texture balances the dense richness of the cheesecake and pairs beautifully with the salted caramel.
2. Sprinkle with Flaky Sea Salt
Just before serving, add a small pinch of flaky sea salt on top. It enhances the sweet-salty contrast and gives a touch of gourmet flair.
3. Serve with Coffee or Espresso
A bold cup of coffee, espresso, or even a caramel latte complements the dessert’s deep flavors and creamy texture. It’s a classic pairing for any cheesecake lover.
4. Add Crunch with Nuts or Toffee
Sprinkle chopped pecans, almonds, or crushed toffee bits over the caramel layer for added texture and flavor contrast.
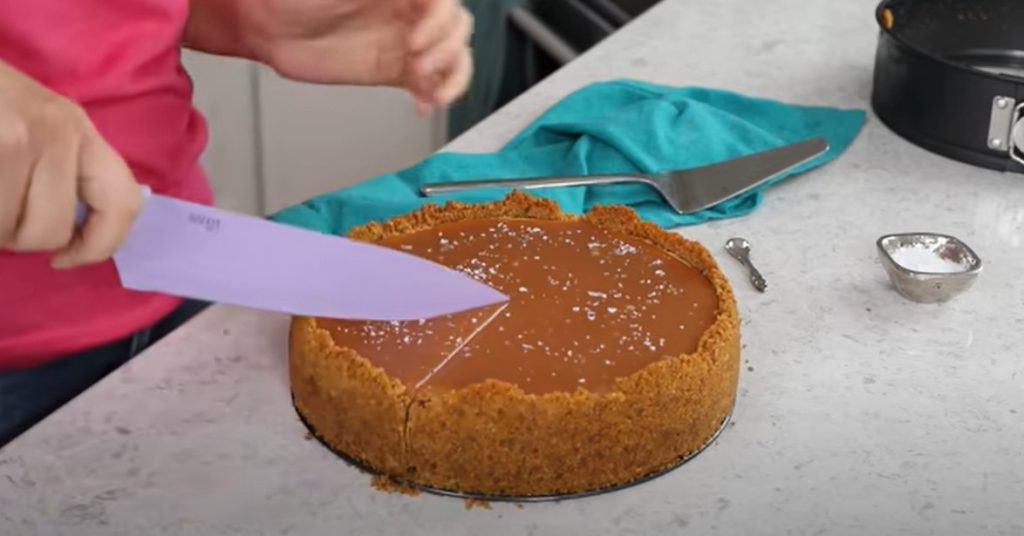
5. Chill for a Clean Slice
For neat presentation, chill the cheesecake until firm and use a hot knife (wiped clean between each cut) to slice. Serve chilled for the best consistency and flavor.
FAQs
1. Can I use store-bought caramel sauce instead of making my own?
Yes, store-bought caramel works well if you’re short on time. For the best flavor, choose a high-quality salted caramel sauce or add a pinch of sea salt to regular caramel.
2. How do I prevent cracks in my cheesecake?
Avoid overmixing the batter and bake the cheesecake in a water bath to maintain even heat. Let it cool slowly in the oven with the door slightly open before refrigerating.
3. Can I make this cheesecake ahead of time?
Absolutely! The cheesecake tastes even better after chilling overnight. Make the caramel sauce a day ahead and store it separately until ready to serve.
4. How long does the cheesecake keep in the fridge?
Store it in an airtight container, and it will stay fresh for up to 4-5 days. For longer storage, you can freeze slices for up to 1 month.
5. Can I use a different crust instead of graham cracker?
Yes! Crushed digestive biscuits, shortbread cookies, or even crushed pretzels make tasty alternatives and add different textures and flavors.
Conclusion
Salted caramel cheesecake offers a perfect harmony of creamy richness and sweet-salty decadence. From the buttery graham cracker crust to the smooth, velvety filling and luscious caramel topping, this dessert delights every palate. Simple steps and a few thoughtful touches create a show-stopping dessert ideal for any occasion. Serve it with whipped cream, a sprinkle of sea salt, or crunchy nuts to add layers of flavor and texture. Whether you’re treating yourself or impressing guests, this cheesecake promises indulgence in every bite. Make it your go-to recipe for moments that call for something truly special.
Related Recipes
- Best Cake Pans for Layered Cakes: Elevate Your Baking Skills
- Rocky Road Cheesecake: A Decadent Dessert With Crunch, Cream, and Chocolate
- Peanut Butter Cup Cheesecake: A Dream Dessert for Chocolate Lovers
Hi there, I’m Preppy Hartwell, but you can call me Preppy—the apron-clad foodie behind Preppy Kitchen Tips! I created Preppy Kitchen Tips because I’m convinced food has a way of telling stories that words can’t. So, grab a fork and dig in. The past never tasted so good!