Chocolate, marshmallows, and nuts meet velvety cheesecake in the most irresistible way. Rocky road cheesecake delivers bold flavor and unbeatable texture in every bite. The rich chocolate base melts into a silky cream cheese filling, while toasted almonds and gooey marshmallows add surprise and crunch that take this dessert to the next level.
This dessert doesn’t just satisfy a sweet tooth—it makes a statement. Each slice tells a story of indulgence, from the fudgy topping to the buttery crust. The contrast of smooth and chunky layers creates a perfect balance that never feels overwhelming. Kids love the marshmallows, adults crave the richness, and guests always ask for seconds.
Bake this for celebrations, cozy nights in, or just because chocolate deserves a little extra flair. Rocky road cheesecake brings fun to your fork and comfort to your cravings. Dessert dreams start right here, and this one is unforgettable.
Ingredients
For the Crust:
- 1 ½ cups chocolate cookie crumbs (like Oreo or chocolate graham crackers)
- ¼ cup granulated sugar
- 6 tablespoons unsalted butter, melted
For the Cheesecake Filling:
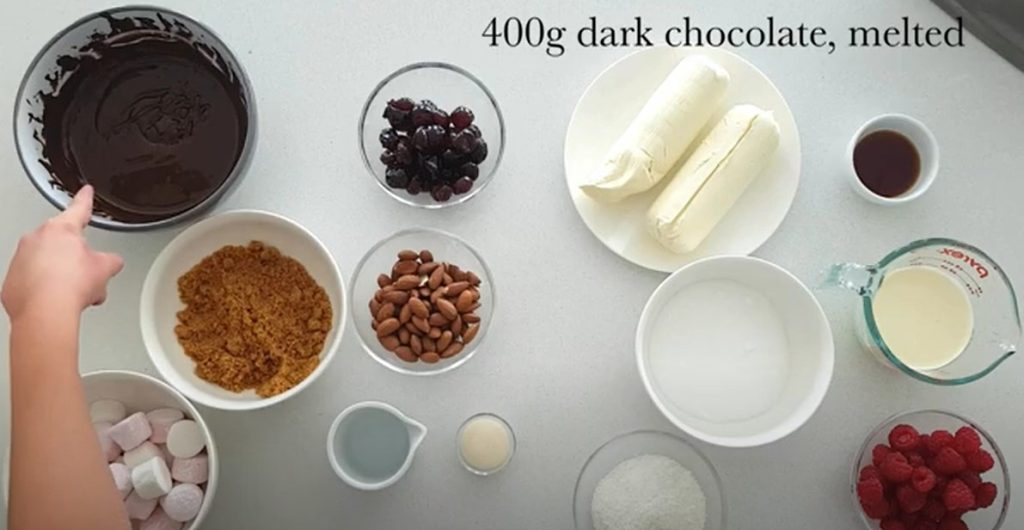
- 24 oz (680g) cream cheese, softened
- 1 cup granulated sugar
- ½ cup sour cream
- 1 teaspoon vanilla extract
- 4 large eggs
- 1 cup semi-sweet chocolate chips, melted and slightly cooled
For the Rocky Road Topping:
- 1 ½ cups mini marshmallows
- ¾ cup chopped toasted almonds or peanuts
- ½ cup semi-sweet chocolate chips (for drizzling)
- 2 tablespoons heavy cream
Equipment Needed
- 9-inch springform pan
- Mixing bowls (medium and large)
- Electric hand mixer or stand mixer
- Rubber spatula or wooden spoon
- Measuring cups and spoons
- Food processor or rolling pin (for crushing cookies)
- Microwave-safe bowl (for melting chocolate)
- Saucepan (for optional water bath)
- Aluminum foil (to wrap pan for water bath)
- Cooling rack
- Offset spatula or butter knife (for smoothing layers)
- Serving plate or cake stand
These tools help ensure a smooth, creamy cheesecake and a flawless rocky road topping.
Preparation Steps of Rocky Road Cheesecake
Step 1: Prepare the Crust
Crush the chocolate cookies into fine crumbs using a food processor or by sealing them in a bag and rolling with a pin. Combine the crumbs, sugar, and melted butter in a bowl. Stir until the texture resembles wet sand.
Step 2: Press and Chill the Crust
Transfer the crust mixture to a 9-inch springform pan. Press it down firmly using the bottom of a flat glass or your fingers to create an even layer. Place it in the fridge to chill while you prepare the filling.
Step 3: Preheat the Oven
Set your oven to 325°F (163°C). Place a rack in the center of the oven. If you’re using a water bath, boil water and prepare a large roasting pan.
Step 4: Melt the Chocolate
In a microwave-safe bowl, heat 1 cup of chocolate chips in 30-second bursts, stirring between each, until melted and smooth. Let it cool slightly before adding to the filling.
Step 5: Make the Cheesecake Filling
In a large mixing bowl, beat the softened cream cheese and sugar until smooth and fluffy. Add sour cream and vanilla, then mix well. One at a time, beat in the eggs, scraping down the sides as needed.
Step 6: Blend in the Chocolate
Slowly pour in the melted chocolate while beating on low speed. Mix until the batter is fully combined and smooth with a deep, chocolaty color.
Step 7: Pour and Smooth the Batter
Take the crust from the fridge and pour the cheesecake batter over it. Use a spatula to spread the top evenly. Gently tap the pan to release any air bubbles.
Step 8: Bake the Cheesecake
Place the pan into a water bath if using, or directly into the oven. Bake for 55–65 minutes, until the edges are set and the center is slightly jiggly. Turn off the oven, crack the door, and let it cool inside for 1 hour.
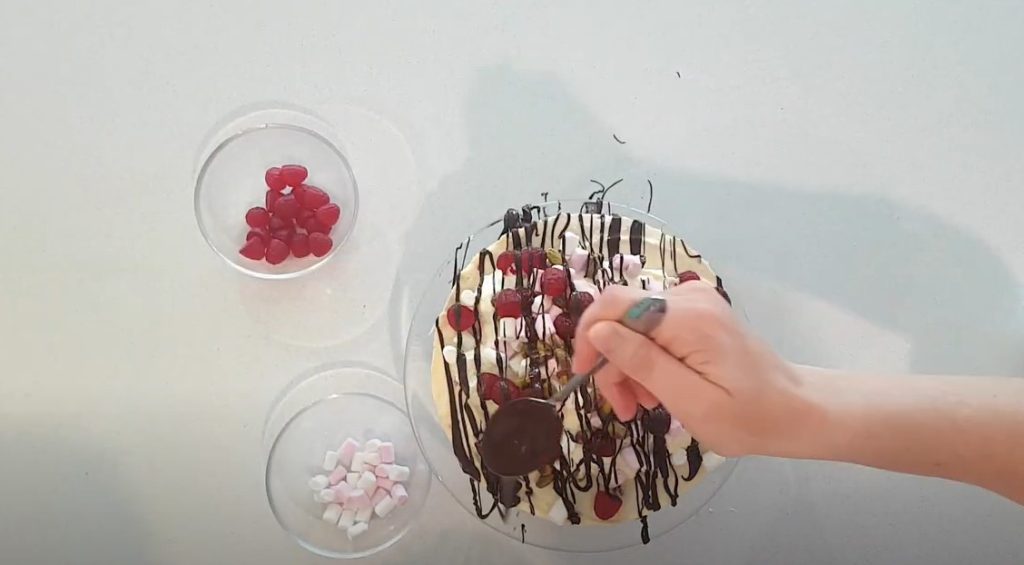
Step 9: Add the Rocky Road Topping
Once the cheesecake is cooled, top it with mini marshmallows and chopped nuts. Melt the remaining chocolate chips with heavy cream and drizzle over the top. Chill the cake for at least 4 hours or overnight.
Step 10: Slice and Serve
Run a knife around the edge of the cheesecake before releasing the springform pan. Slice with a warm knife for clean edges. Serve chilled and enjoy every crunchy, creamy, chocolaty bite!
Cooling and Setting
After baking, leave the cheesecake inside the oven with the door slightly open for about 1 hour. This helps prevent cracks by allowing it to cool slowly. Remove it from the oven and place the pan on a wire rack. Let it come to room temperature completely.
Once cooled, transfer the cheesecake to the refrigerator. Chill it for at least 4 hours, but overnight gives the best results. During this time, the texture firms up and the flavors develop fully.
Before serving, ensure the cheesecake is fully set and cold to the touch. Gently release the springform pan, and move the cheesecake to a serving plate. For best slicing results, dip a sharp knife in hot water, wipe it dry, and cut through the cheesecake. Repeat between slices for clean, smooth cuts.
This cooling and setting step is key to a creamy, sliceable, and picture-perfect rocky road cheesecake.
Serving Suggestions
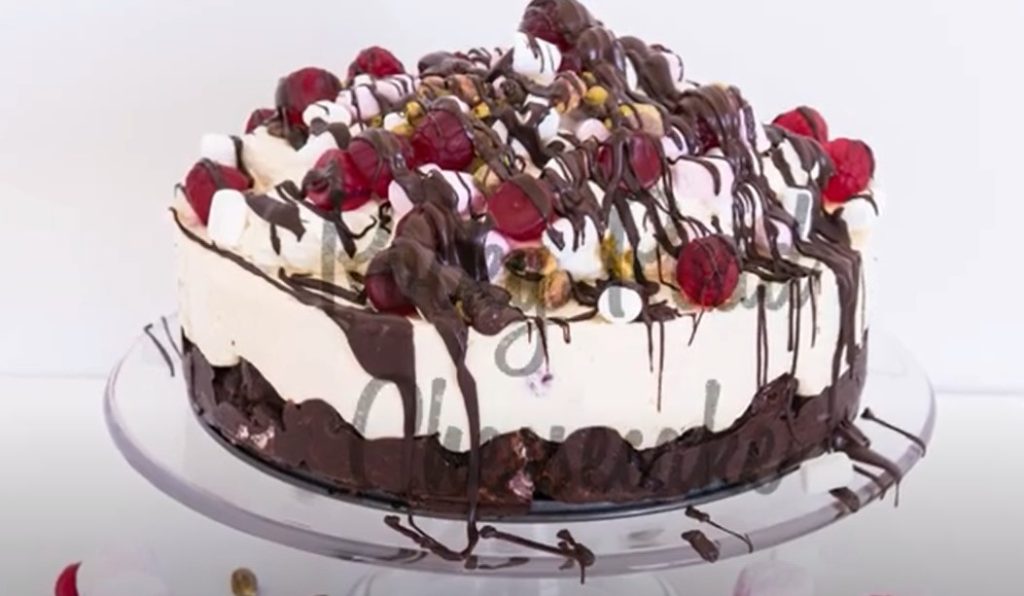
Rocky road cheesecake deserves a presentation as bold as its flavor. Serve each slice chilled to maintain its rich, creamy texture. Add a small dollop of whipped cream on the side or directly on top for an extra touch of indulgence.
Drizzle warm chocolate sauce or caramel over the slices for added sweetness. Sprinkle extra chopped almonds or mini marshmallows for texture and flair. For a festive look, top each piece with a maraschino cherry or a shard of chocolate bark.
Pair with a hot espresso, mocha, or cold glass of milk to complement the dessert’s richness. Serve on a white or dark dessert plate to make the colors pop—this cheesecake doesn’t just taste amazing, it looks stunning too.
Perfect for birthdays, potlucks, or any celebration that calls for a dessert centerpiece, rocky road cheesecake turns any moment into a chocolate lover’s dream.
FAQs
1. Can I make rocky road cheesecake ahead of time?
Yes! Rocky road cheesecake is perfect for making ahead. It needs several hours to chill and set, so preparing it a day in advance works best.
2. How do I prevent cracks in my cheesecake?
Cool the cheesecake slowly by letting it sit in the oven with the door slightly open after baking. Avoid overmixing the batter and always bake at a steady, moderate temperature.
3. Can I freeze rocky road cheesecake?
Yes. Wrap individual slices or the whole cheesecake tightly in plastic wrap and foil. Freeze for up to 1 month. Thaw in the fridge overnight before serving.
4. What nuts work best for the topping?
Toasted almonds and peanuts are popular choices, but pecans or walnuts also work well. Always toast them lightly for better flavor and crunch.
5. Is a water bath necessary?
A water bath helps the cheesecake bake evenly and reduces the risk of cracks, but it’s optional. If skipped, reduce the oven temperature slightly and monitor carefully.
Conclusion
Rocky road cheesecake combines rich chocolate, creamy filling, fluffy marshmallows, and crunchy nuts in one unforgettable dessert. It’s a treat that brings texture, flavor, and pure joy to every bite. Whether you’re serving a crowd or indulging solo, this cheesecake delivers big on both presentation and taste. A showstopper dessert has never been this easy—or this delicious.
Related Recipes
- Do You Bake Cheesecake? Discover Pro Tips & Tricks
- Why Did My Cheesecake Crack? Tips to Prevent It
- Peanut Butter Cup Cheesecake: A Dream Dessert for Chocolate Lovers
Hi there, I’m Preppy Hartwell, but you can call me Preppy—the apron-clad foodie behind Preppy Kitchen Tips! I created Preppy Kitchen Tips because I’m convinced food has a way of telling stories that words can’t. So, grab a fork and dig in. The past never tasted so good!