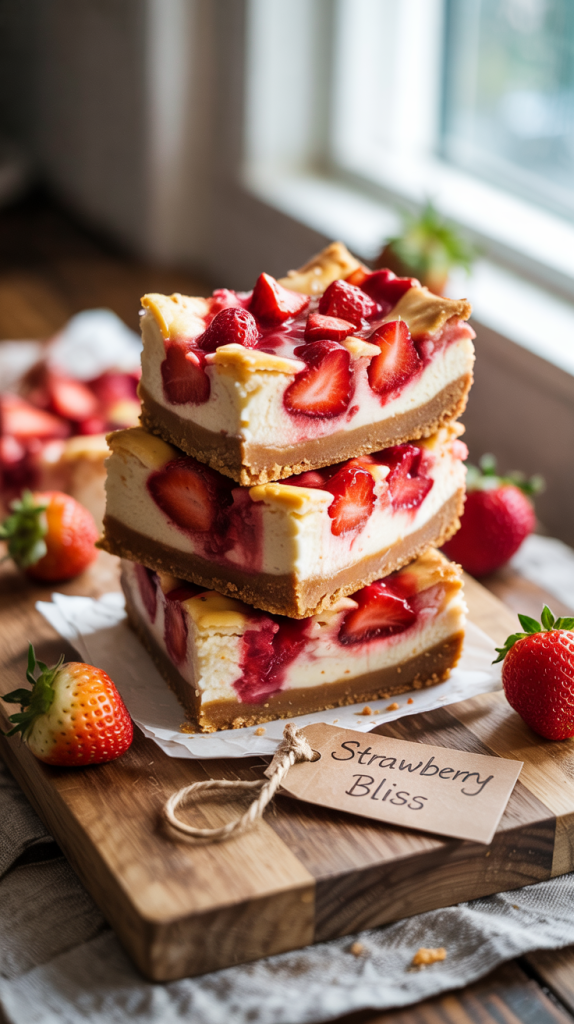
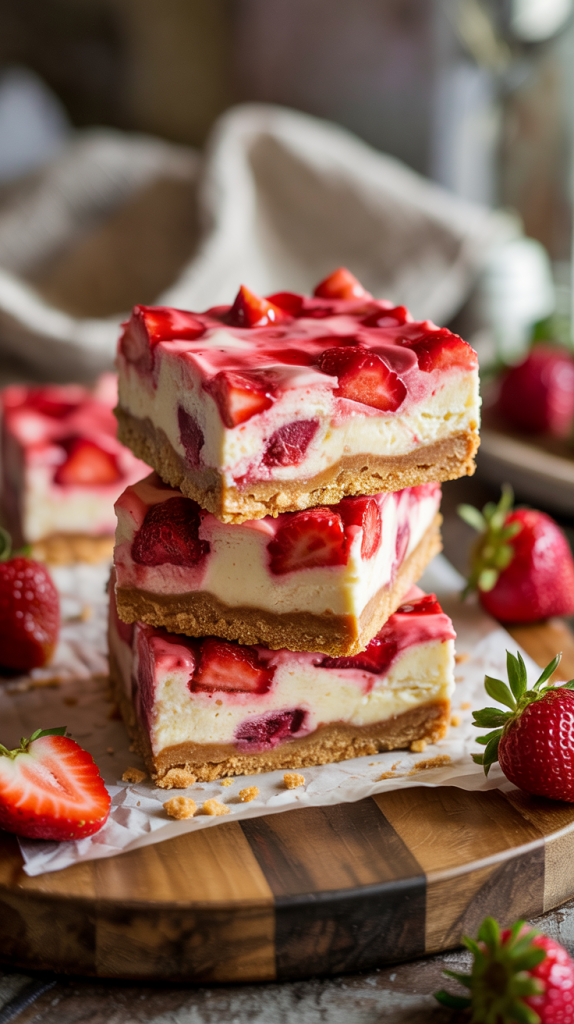
A buttery graham cracker crust. A silky layer of creamy cheesecake. A burst of sweet strawberry topping. These strawberry cheesecake bars deliver all the flavor of a classic cheesecake in an easy-to-slice square. No springform pan. No water bath. Just pure dessert joy from the first bite to the last crumb. This treat balances rich and fruity in every bite, making it perfect for family get-togethers, backyard BBQs, or cozy nights in. The crust stays crisp, the filling stays smooth, and the strawberry swirl steals the show. Each bar packs the kind of sweetness that turns casual tasters into repeat snackers. Serve them chilled for a cool contrast to warm summer evenings, or pair with hot coffee for an indulgent winter treat. One pan delivers enough to share, but don’t be surprised if the bars disappear faster than expected. Dessert this good rarely sticks around for long.
Ingredients
For the Crust:
- 1 ½ cups graham cracker crumbs
- ¼ cup granulated sugar
- ½ cup unsalted butter, melted
For the Cheesecake Layer:
- 16 oz cream cheese, softened
- ½ cup granulated sugar
- 2 large eggs
- 1 tsp vanilla extract
- ¼ cup sour cream
For the Strawberry Swirl:
- ¾ cup fresh strawberries, chopped
- 2 tbsp granulated sugar
- 1 tsp lemon juice
Equipment Needed
- 8×8 or 9×9 inch baking pan
- Mixing bowls (medium and large)
- Hand mixer or stand mixer
- Rubber spatula or wooden spoon
- Measuring cups and spoons
- Food processor or zip-top bag (to crush graham crackers)
- Small saucepan (for strawberry topping)
- Fine mesh strainer or blender (optional, for smoother strawberry puree)
- Parchment paper (for easy removal from pan)
- Knife (for slicing bars)
- Cooling rack
Step By Step Guide Of Strawberry Cheesecake Bars
Step 1: Prepare the Pan
Line an 8×8 or 9×9 inch baking pan with parchment paper, leaving some overhang on the sides. This makes it easier to lift out the bars after chilling. Lightly grease the paper with nonstick spray or a little butter to prevent sticking.
Step 2: Make the Graham Cracker Crust
Crush the graham crackers into fine crumbs using a food processor or by sealing them in a zip-top bag and rolling with a rolling pin. Mix the crumbs with ¼ cup granulated sugar and melted butter in a bowl. Stir until the mixture looks like wet sand.
Step 3: Press and Bake the Crust
Pour the crust mixture into the prepared pan. Press it down firmly using the bottom of a measuring cup or glass to form an even layer. Bake at 325°F (163°C) for 10 minutes. Let it cool while you make the filling.
Step 4: Prepare the Strawberry Swirl
Add chopped strawberries, sugar, and lemon juice to a small saucepan. Cook over medium heat, stirring occasionally, until the strawberries break down and the mixture thickens (about 8–10 minutes). Blend for a smooth texture or mash with a fork for a chunkier swirl. Let it cool completely.
Step 5: Make the Cheesecake Filling
In a large bowl, beat softened cream cheese until smooth and creamy. Add sugar and mix again. Crack in the eggs one at a time, beating after each. Stir in vanilla extract and sour cream until everything blends into a silky mixture without lumps.
Step 6: Pour the Filling Over the Crust
Once the crust has cooled, pour the cheesecake filling on top. Use a spatula to spread it evenly from edge to edge. Make sure the surface is smooth for an even bake and pretty swirl.
Step 7: Add the Strawberry Swirl
Drop spoonfuls of the cooled strawberry mixture over the cheesecake layer. Use a toothpick or knife to gently swirl the strawberry topping into the batter. Avoid overmixing—you want distinct ribbons of red across the top.
Step 8: Bake Until Set
Place the pan back in the oven and bake at 325°F (163°C) for 35–40 minutes. The edges should look set, but the center should have a slight jiggle. Don’t overbake—cheesecake firms up as it cools.
Step 9: Cool and Chill
Let the bars cool completely in the pan on a wire rack. Then cover and refrigerate for at least 4 hours or overnight. This step ensures the bars set properly and slice cleanly.
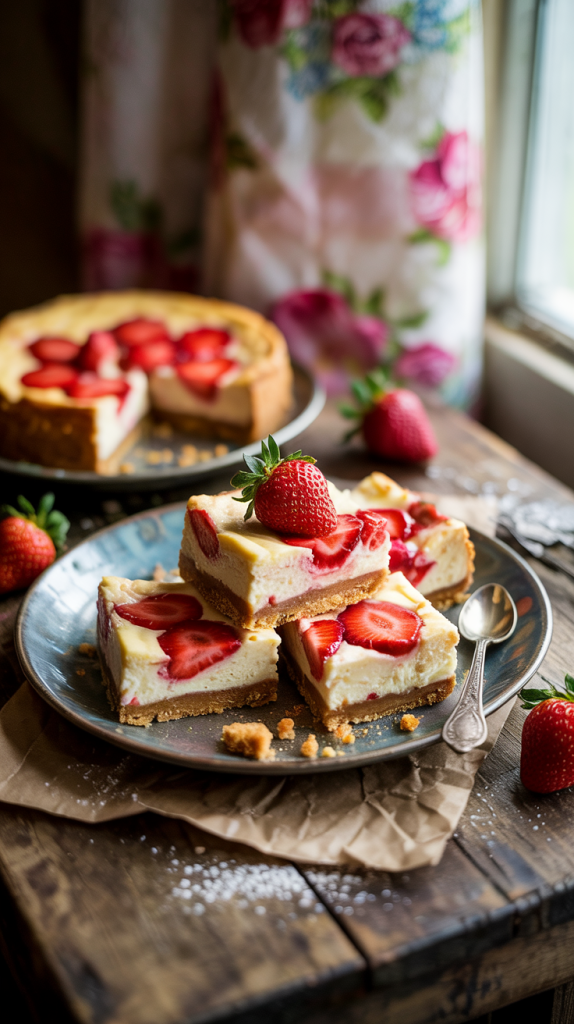
Step 10: Slice and Serve
Lift the chilled cheesecake out using the parchment paper overhang. Cut into squares using a sharp knife, wiping between cuts for neat edges. Serve chilled, and store leftovers in an airtight container in the fridge for up to 5 days.
Tips and Tricks
- Use room-temperature ingredients: Let your cream cheese, eggs, and sour cream sit out for about 30 minutes before mixing. This helps the filling blend smoothly without lumps.
- Don’t skip parchment paper: Lining the pan with parchment makes lifting the bars out a breeze. It also prevents the crust from sticking to the bottom.
- Crush graham crackers evenly: A food processor gives you fine, even crumbs, but a rolling pin and zip-top bag work too. Just make sure the pieces aren’t too coarse or your crust won’t hold together well.
- Cool strawberry sauce completely: Warm sauce can melt the cheesecake layer and cause uneven baking. Let it cool before swirling.
- Swirl gently: A few figure-eights with a toothpick are all you need. Over-swirling blends the layers too much and dulls the appearance.
- Chill for clean slices: Refrigerate for at least 4 hours. Use a hot knife (run it under hot water and wipe dry) to get sharp, bakery-style cuts.
FAQs
1. Can I use frozen strawberries instead of fresh?
Yes, frozen strawberries work well. Thaw them completely and drain excess liquid before cooking them down for the swirl. This prevents the topping from becoming too watery.
2. How long do these bars last in the fridge?
Store the cheesecake bars in an airtight container in the refrigerator for up to 5 days. The texture stays smooth, and the flavors actually deepen over time.
3. Can I freeze strawberry cheesecake bars?
Yes, these bars freeze beautifully. Wrap each square individually in plastic wrap, then place them in a freezer-safe container. Freeze for up to 2 months and thaw overnight in the fridge before serving.
4. What’s the best way to get clean slices?
Use a sharp knife and clean it between each cut. Running the knife under hot water and drying it with a towel helps make clean, professional-looking slices.
5. Can I make these bars ahead of time?
Absolutely. These bars are perfect for making a day or two in advance. The flavor improves with time, and chilling overnight helps them set perfectly for slicing.
Conclusion
Strawberry cheesecake bars bring all the indulgence of a classic cheesecake into a convenient, shareable form. The sweet berry swirl and creamy filling create a balanced bite that’s rich but not overwhelming. These bars work beautifully for holidays, casual gatherings, or a treat-yourself moment during the week. No need for complicated equipment or expert skills—just basic pantry staples and a little love in the kitchen. Keep a batch chilled for dessert emergencies, and don’t be surprised if they disappear before the day ends. One slice leads to another, and before you know it, you’ll be planning your next pan.
Related Recipes
- Strawberry Shortcake Cheesecake: A Sweet Slice of Summer Bliss
- Italian Ricotta Cheesecake: A Creamy Slice of Sicilian Heaven
- Savory Mornings Made Easy: Egg Muffins with Cottage Cheese Delight
Hi there, I’m Preppy Hartwell, but you can call me Preppy—the apron-clad foodie behind Preppy Kitchen Tips! I created Preppy Kitchen Tips because I’m convinced food has a way of telling stories that words can’t. So, grab a fork and dig in. The past never tasted so good!