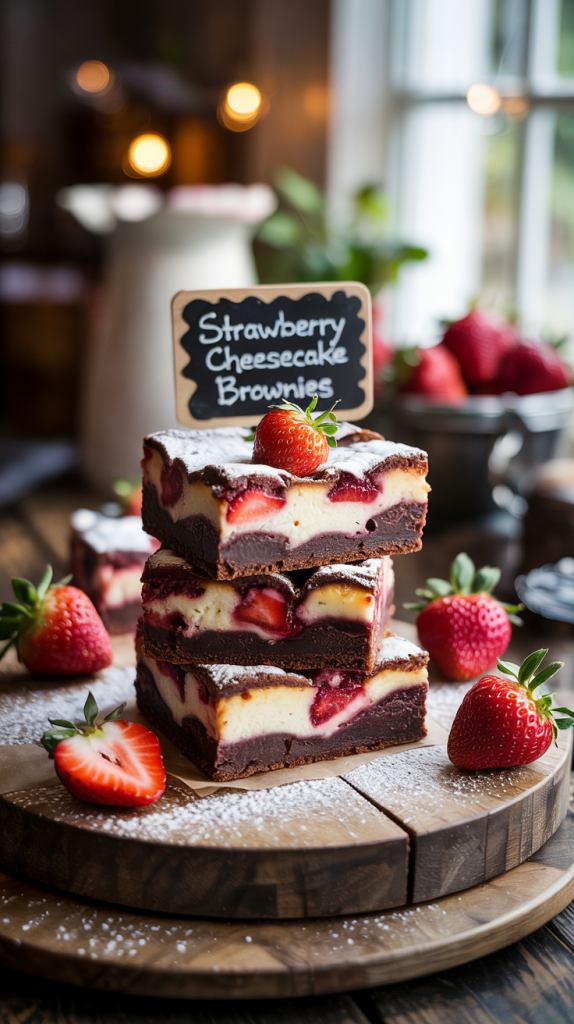
A thick swirl of creamy cheesecake meets the rich depth of fudgy brownie in this dreamy dessert mashup. Fresh strawberries add a juicy pop that cuts through the richness just enough to keep each bite exciting. This isn’t your average brownie, and it definitely isn’t your typical cheesecake—it’s the perfect marriage of both, layered and baked into a treat that steals the show every time.
Each square delivers soft chocolate, silky creaminess, and bursts of real fruit flavor. No boxed mixes, no shortcuts—just honest, homemade goodness that turns a regular day into something worth celebrating. These strawberry cheesecake brownies disappear fast at potlucks and make the ultimate weekend baking reward. They strike the balance between indulgent and fresh, with a texture that melts into every sweet tooth’s dream. Grab a pan, preheat the oven, and get ready to swirl your way into a new favorite dessert.
Ingredients
For the Brownie Layer:
- ½ cup (1 stick) unsalted butter, melted
- 1 cup granulated sugar
- 2 large eggs
- 1 teaspoon vanilla extract
- ⅓ cup unsweetened cocoa powder
- ½ cup all-purpose flour
- ¼ teaspoon salt
- ¼ teaspoon baking powder
For the Cheesecake Swirl:
- 8 oz cream cheese, softened
- ¼ cup granulated sugar
- 1 egg yolk
- ½ teaspoon vanilla extract
For the Strawberry Swirl:
- ½ cup fresh strawberries, finely chopped
- 1 tablespoon granulated sugar
- 1 teaspoon lemon juice
Tools & Equipment
- 8×8 inch baking pan (lined with parchment paper)
- Mixing bowls (medium and large)
- Hand mixer or stand mixer
- Whisk
- Rubber spatula or wooden spoon
- Measuring cups and spoons
- Small saucepan (for strawberry mixture)
- Knife or skewer (for swirling layers)
- Cooling rack
Step By Step Guide Of Strawberry Cheesecake Brownies
Step 1: Prepare the Baking Pan
Line an 8×8 inch square baking pan with parchment paper, leaving a bit of overhang on the sides. This helps lift the brownies out easily after baking. Lightly grease the paper with butter or non-stick spray to prevent sticking.
Step 2: Preheat the Oven
Set your oven to 350°F (175°C). Give it enough time to fully preheat. A properly heated oven ensures even baking, especially for layered desserts like this one.
Step 3: Make the Brownie Batter
In a large mixing bowl, whisk together the melted butter and sugar until smooth. Add eggs and vanilla, then whisk again until glossy and thick. Sift in the cocoa powder, flour, salt, and baking powder. Stir until just combined—don’t overmix. Set aside.
Step 4: Prepare the Cheesecake Mixture
In a medium bowl, beat the softened cream cheese until smooth. Add sugar, egg yolk, and vanilla extract. Mix until creamy and well blended with no lumps. The mixture should be soft and spreadable.
Step 5: Make the Strawberry Swirl
In a small saucepan, combine chopped strawberries, sugar, and lemon juice. Cook over medium heat for 5–6 minutes until the strawberries soften and release juice. Stir often. Let it cool slightly, then mash gently to form a chunky sauce.
Step 6: Layer the Brownie Batte
Pour about ¾ of the brownie batter into the prepared pan. Spread it evenly with a spatula, making sure it reaches the edges. This forms the base layer of your brownie.
Step 7: Add Cheesecake and Strawberry Layers
Spoon the cheesecake mixture in small dollops over the brownie base. Add spoonfuls of the strawberry mixture on top of the cheesecake. Drop the remaining brownie batter randomly over the surface.
Step 8: Swirl the Layers
Use a knife or skewer to gently swirl the layers together. Drag the tip through the batter in a figure-eight motion. Be careful not to over-swirl—you want to see ribbons of each layer.
Step 9: Bake to Perfection
Place the pan in the center of the oven. Bake for 35–40 minutes, or until the center is just set and a toothpick comes out with a few moist crumbs. The edges should look slightly puffed and set.
Step 10: Cool, Chill, and Slice
Remove the pan and let it cool on a wire rack. Once cooled, refrigerate for at least 1 hour. This helps the cheesecake set for cleaner slices. Lift out the brownies, slice into squares, and serve.
Tips & Tricks
1. Use Room Temperature Ingredients
Ensure that both the cream cheese and eggs are at room temperature before mixing. This prevents lumps in the cheesecake filling and helps it blend smoothly into the batter.
2. Don’t Overmix the Brownie Batter
Mix the brownie ingredients until just combined. Overmixing can lead to dense, tough brownies. The batter should remain slightly thick and fudgy.
3. Swirl with Care
When swirling the layers, avoid over-mixing. A few gentle figure-eight motions with a knife or skewer are enough to create the marbled effect. Too much swirling will result in a muddled, less distinct swirl.
4. Use Fresh Strawberries for Best Flavor
Fresh strawberries provide the best flavor and texture. If using frozen, make sure they’re thawed and well-drained to prevent excess moisture in the batter.
5. Check for Doneness
Since ovens vary, it’s essential to check the brownies towards the end of the baking time. Insert a toothpick into the center; if it comes out with just a few moist crumbs, your brownies are ready. They’ll continue to firm up as they cool.
6. Let Brownies Cool Before Cutting
Allow the brownies to cool completely before slicing. Chilling them in the refrigerator for at least an hour helps the cheesecake layer set, making them easier to cut into neat squares.
7. Add a Strawberry Garnish
For an extra touch of elegance, garnish each brownie with a fresh strawberry or a dollop of whipped cream. This adds freshness and a pop of color.
8. Customize the Swirl
Feel free to get creative with the swirl. You can use raspberries, blueberries, or other fruits in place of strawberries for a different flavor twist. Just adjust the fruit quantities to maintain the right texture.
9. Avoid Overbaking
Since the cheesecake layer is delicate, it’s better to slightly underbake than overbake. The brownies will continue cooking from residual heat even after they’re out of the oven, so don’t let them dry out.
10. Storage Tips
Store any leftovers in an airtight container in the fridge for up to 3–4 days. These brownies can also be frozen for up to a month—just wrap them tightly in plastic wrap and foil before freezing.
FAQs
1. Can I use a different fruit instead of strawberries?
Yes! You can substitute strawberries with raspberries, blueberries, or even mixed berries. Just be sure to adjust the amount depending on the type of fruit you use to maintain the right consistency in the swirl.
2. Can I make the brownie batter ahead of time?
Yes, you can prepare the brownie batter a day ahead and refrigerate it until you’re ready to bake. Just make sure to give it a good stir before using to ensure the ingredients are evenly mixed.
3. How can I make the cheesecake layer smoother?
Ensure that your cream cheese is softened to room temperature before mixing. This will help avoid lumps. You can also use a hand mixer or stand mixer to achieve a smoother consistency for the cheesecake filling.
4. Can I make these brownies without the swirl?
Absolutely! If you prefer a more traditional brownie, simply skip the cheesecake and strawberry swirl and bake the brownie batter on its own. You can also make a cheesecake topping separately if you’d like.
5. How do I store leftover brownies?
Store any leftover brownies in an airtight container in the refrigerator for up to 3–4 days. You can also freeze them for up to a month—wrap them tightly in plastic wrap and foil before freezing.
Conclusion
These strawberry cheesecake brownies are the perfect blend of rich, fudgy brownie goodness and a creamy cheesecake layer with a refreshing fruit swirl. Each bite delivers a burst of flavors and textures, making it impossible to stop at just one. Whether for a weekend treat, a party dessert, or simply to satisfy a sweet tooth, this recipe is sure to impress. Plus, with easy substitutions and simple steps, you can make these brownies your own. Don’t forget to share them with friends and family—they’ll be asking for the recipe! Enjoy!
Related Recipes
- Cheesecake Bars 9X13 | Cheesecake Bars for a Crowd
- Cheesecake With Strawberry Topping: The Ultimate Cheesecake Delight
- Strawberry Cheesecake Bars That Melt in Your Mouth
Hi there, I’m Preppy Hartwell, but you can call me Preppy—the apron-clad foodie behind Preppy Kitchen Tips! I created Preppy Kitchen Tips because I’m convinced food has a way of telling stories that words can’t. So, grab a fork and dig in. The past never tasted so good!